“Doxe ” SaaS Doctors Chamber, Prescription & Appointment Script
Documentation by - Codericks
“Doxe”
Created: 10.05.2020
By: Codericks
Email: [email protected]
Thanks for purchasing our script for your business. If you have any questions or need any help, please feel free to email us via our profile page contact form here. Thanks you so much!
Table of Contents
- Introduction
- Quick Install
- Quick Start Guide
- Site Settings
- Payment Settings
- Manage Users
- Manage Services
- Manage Plans
- Manage Pages
- Manage Blogs
- Manage FAQS
- Cron Jobs expire payments
- Subscriptions
- Manage Chambers
- Manage Staffs
- Manage Departments
- Manage Patients
- Manage Drugs
- Booking Appointments
- Manage Appointments
- Prescriptions Prescriptions
- Manage Prescriptions
- Manage Profile
- Staff Panel
- Patient Panel
- Update Password
- Credits
1) Introduction - top
Doxe is a complete SaaS-based doctors chamber, appointment & prescription Software that gives your customers the ability to create and manage staffs, prescriptions, patients, drugs, advises, reports, appointments etc. Users also can create multiple chambers & assign staffs so they can easily keep track of their chambers, patients & appointments in one platform.
Technologies used:- PHP CodeIgniter 3
- HTML 5
- CSS (Bootstrap 4)
- JQUERY
- AJAX
- Bootstrap
- Easy Integration & Customization
- Standared secured & clean code
- Fully Responsive Design
- SEO Optimized & SEO-Friendly URL
- Frontend website
- Manage website with unllimlited features & pages
- Manage pricing packages & features
- Pricing plan enable/disable with limit options
- Manage Contact Messages
- Manage Users
- Manage FAQs
- Manage Blogs with category
- Cash flow chart reports
- Net Incomes
- reCaptcha enable / disable opiton
- Email verification enable / disable opiton
- Paypal payment enable / disable opiton
- Stripe payment enable / disable opiton
- Registration enable / disable opiton
- Blogs enable / disable opiton
- Users enable / disable opiton
- Google Analytics
- SMTP email with PHPMailer library
- Google reCaptcha attached with (Register & Contacts forms with enable or disable option)
- Advanced settings option
- Admin, User, Staff & Patient panel
- Multiuser & Multistaff options
- Membership System with 3 packages
- Paypal payment system
- Stripe payment system
- Create & manage chambers
- Create & manage staffs
- Create & manage patients
- Create & manage diagonosis
- Create & manage advises
- Create & manage additional advises
- Create & manage diagonosis tests
- Create & manage durgs
- Create & manage prescriptions
- Create & manage apinments
- Set schedule for apinments
- Manage profile with education & experiences
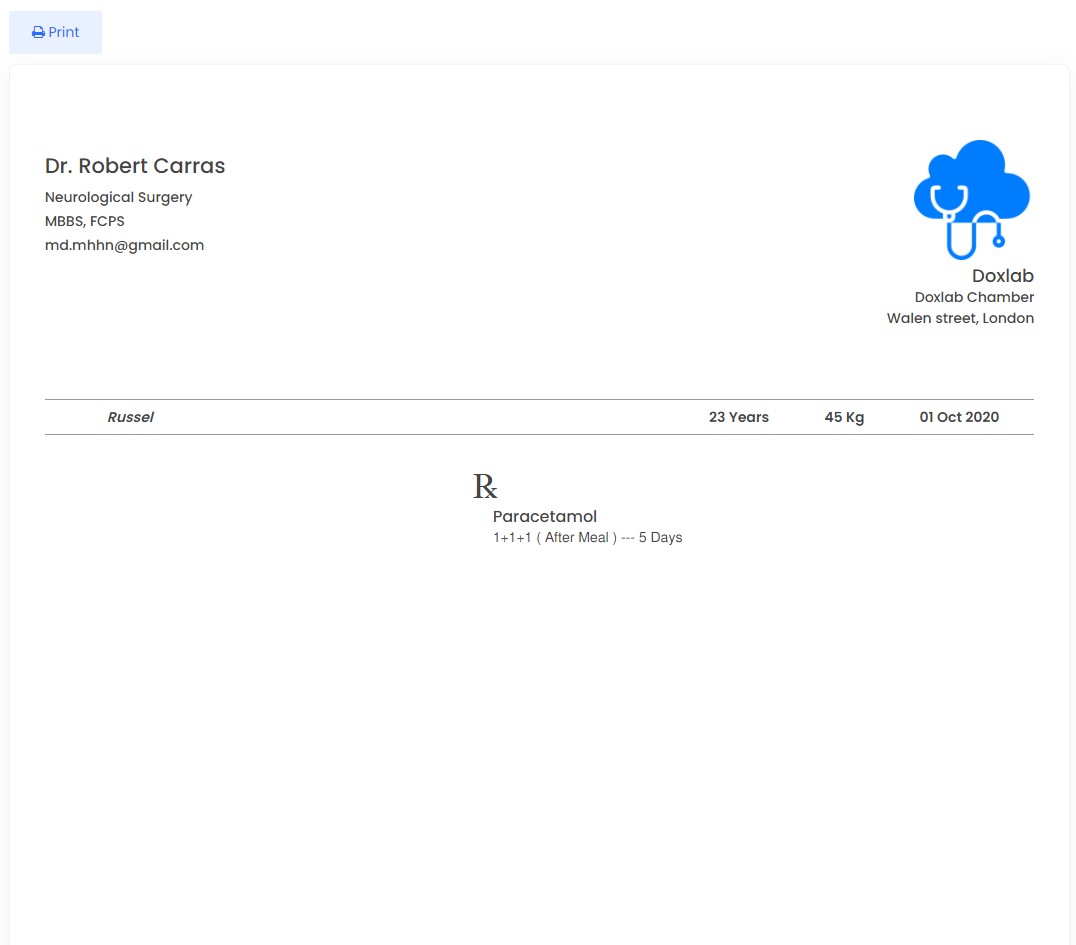
- Print prescriptions
- Auto generate serial numbers for apinments
- Date wise apinment serials
- Ajax secure Authentication
- Jquery Data tables & form validations
- Sweetalert & toast notification with ajax
- Detailed Documentation with commented code
- Totally Secure System
- Advanced Settings Options with Enable or Disable options
- Change Logo, Favicon, Home hero image, Site Title, Site Description, etc. from Admin Panel
- Easy Installation Using Installation Wizard & no need any coding skills
- Runs on PHP 7.0+
Security:
There are various mechanisms to secure application. These mechanisms are:
- Cross-Site Request Forgery (CSRF) Prevention
- Cross-Site Scripting (XSS) Prevention
- Output Escaping
- Password Hashing
Requirements:
There are some requirements to work on your server. These requirements are:
- PHP >= 7+
- cUrl
2) Install - top
To Install this project:
Note: Please check your PHP version before installing. In order to work properly, your PHP version should be at least 7.0.
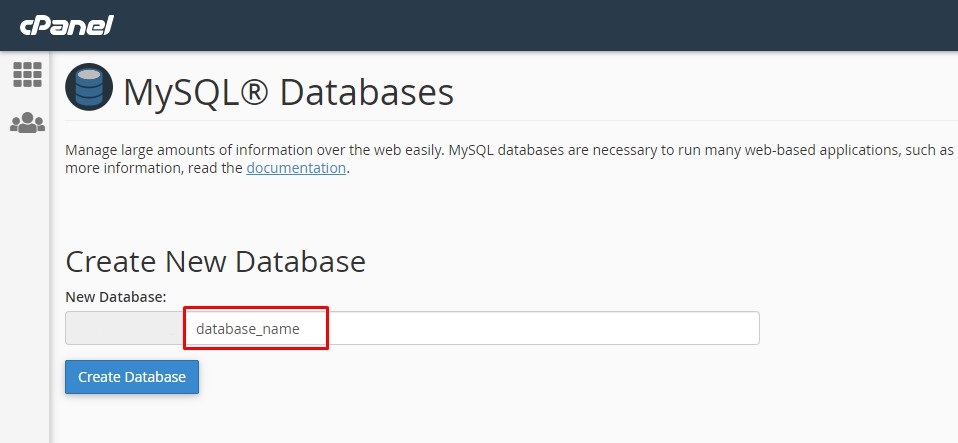
1. Create a new Database with user that has all permissions.- Go to Cpanel and Click MySQL® Databases

- Step 1: Create New Database
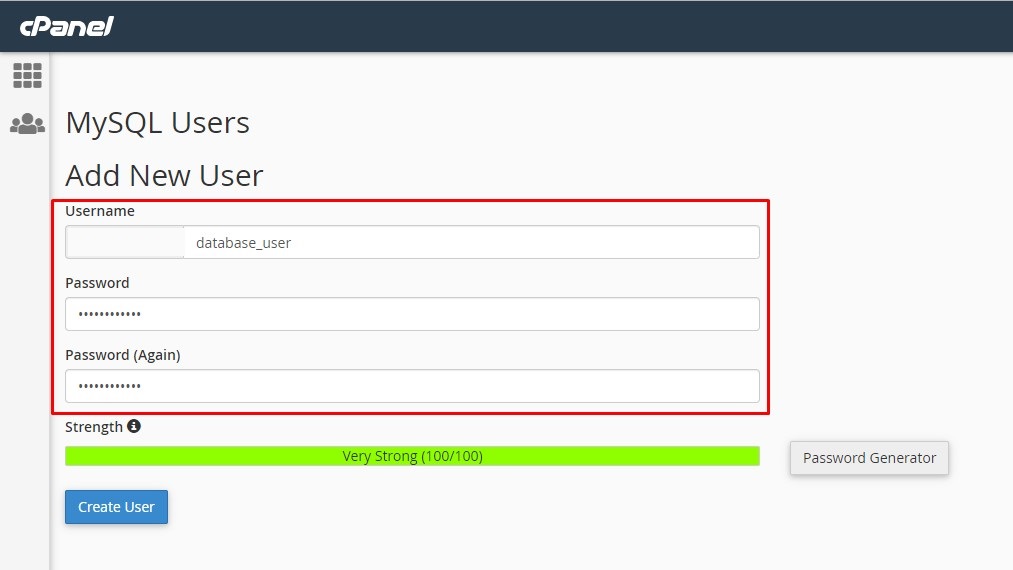
- Step 2: Add New User
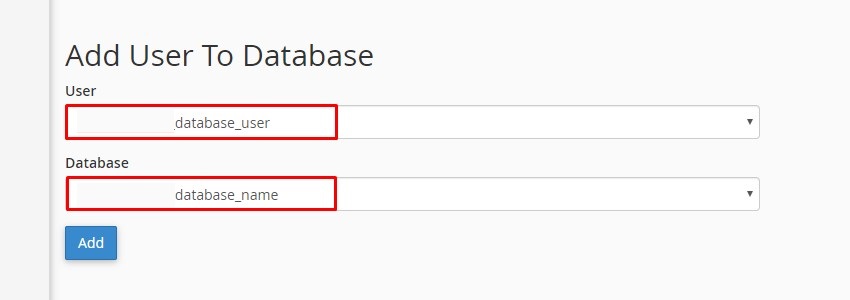
- Step 3: Add User To Database
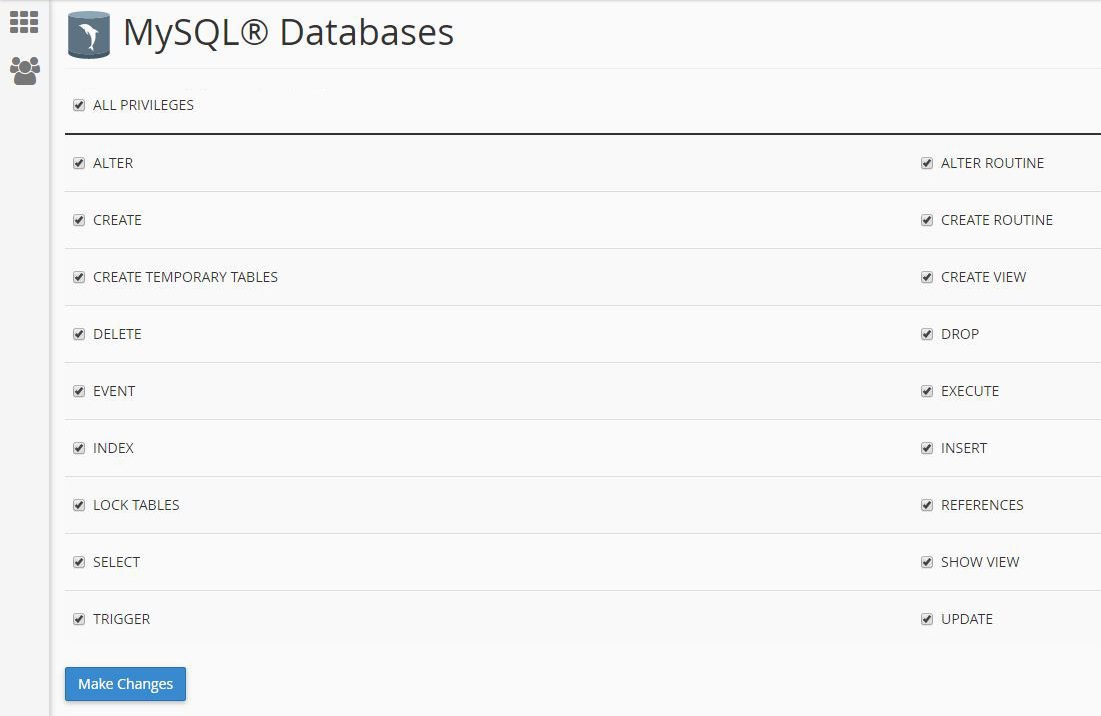
- Step 4: Set User Permissions
3. Run the Install file by entering this link to your browser address bar: http://yourdomain.com/install
4. Follow the Installation Instructions below.
-
Enter your Envato item Purchase code and click "Get License" button. If you are a valid user you will see the next step.
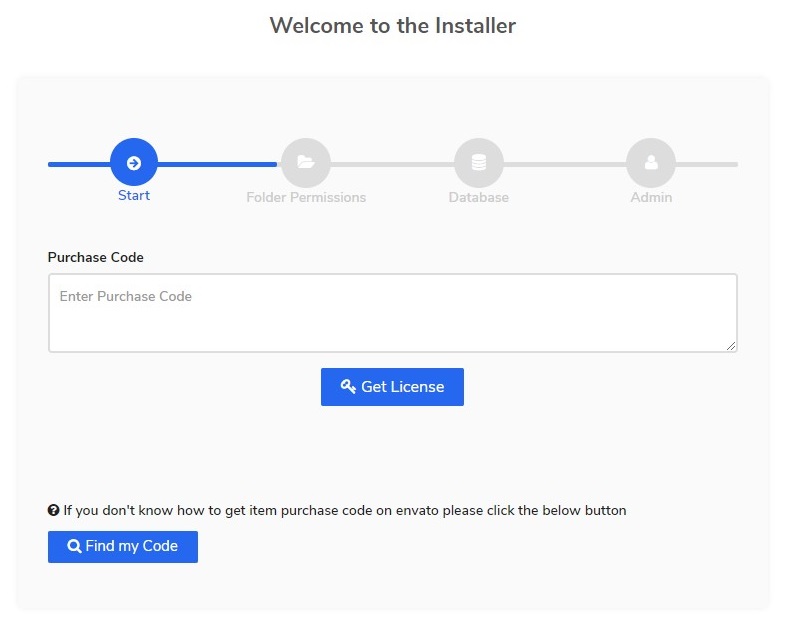
- Check your folder permissions. If all folders are writable, click Next

-
Enter your database credentials. Then click next.

***Note: If you want to change your database credentials later, you can edit the database.php file inside the application / config folder. -
Enter your admin credentials. Then click finish.

5. Delete/Rename the install folder on the main directory.
Still no luck
After installation, if you get "404 Not Found" error or you can not login to your site, please upload & replace again the htaccess file from script files and.
3) Quick Start - top
After run project, you will be see the login page like this.
For access use this: www.domain.com/login

Admin
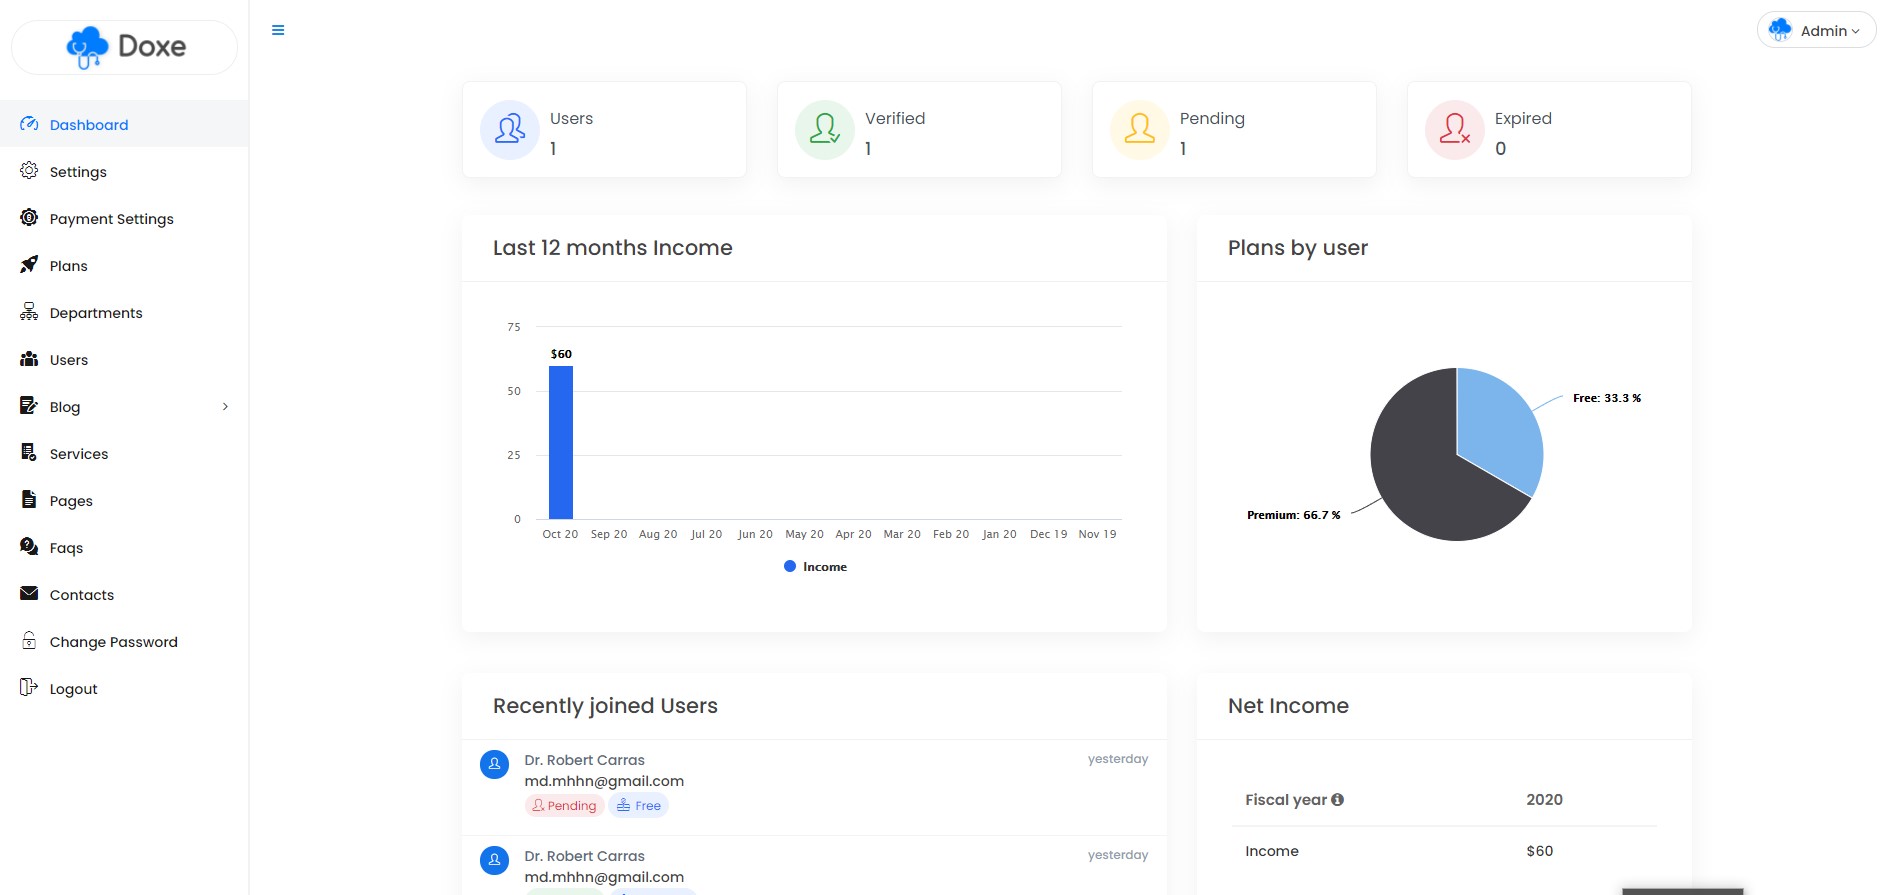
✓ Change Admin Password: If you want to change Admin password you should go to "Change Password" section from left sidebar and change the password.✓ Manage Website Settings: If you want to add your site name, title, email, phone, about, logo, favicon, emails, currency & basic seo options, social links you need to go "Dashboard > Settings" section from left sidebar. you can manage all options here.
✓ Manage Payment Settings: If you want to manage your paypal & stripe payment options, you need to go "Dashboard > Payment Settings" section from left sidebar. you can also enable/disable payments from here.
✓ Manage users: If you want to manage registered users you need to go "Dashboard > Users" section from left sidebar. you can manage all users here.
✓ Manage Site Features: If you want to manage your product services you need to go "Dashboard > Service" section from left sidebar. you can manage all option here.
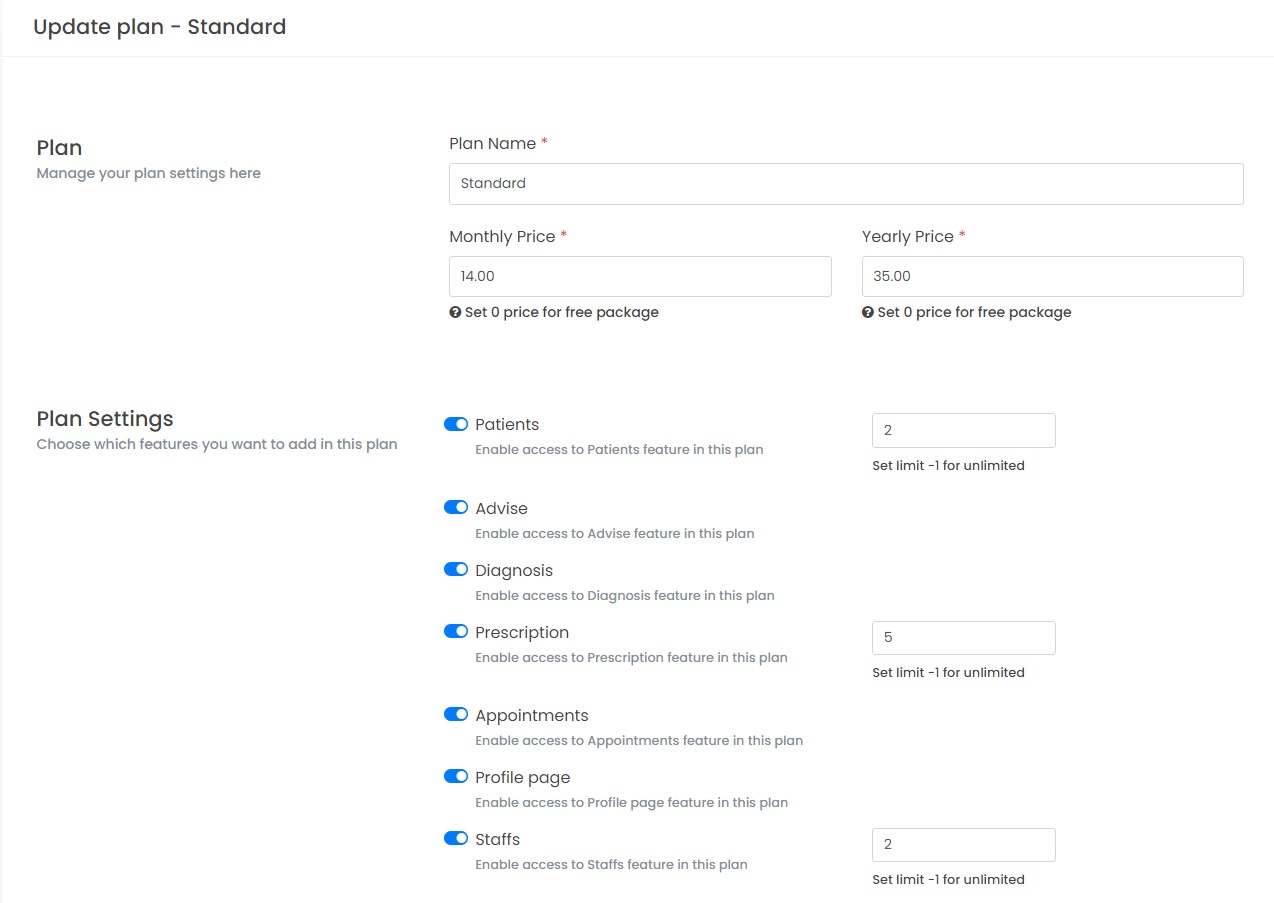
✓ Manage Plans & Assign Feature: If you want to manage your Plans & Features you need to go "Dashboard > Plans" section from left sidebar. you can also assign features to click the "Edit Plan" button manage features for this plan.
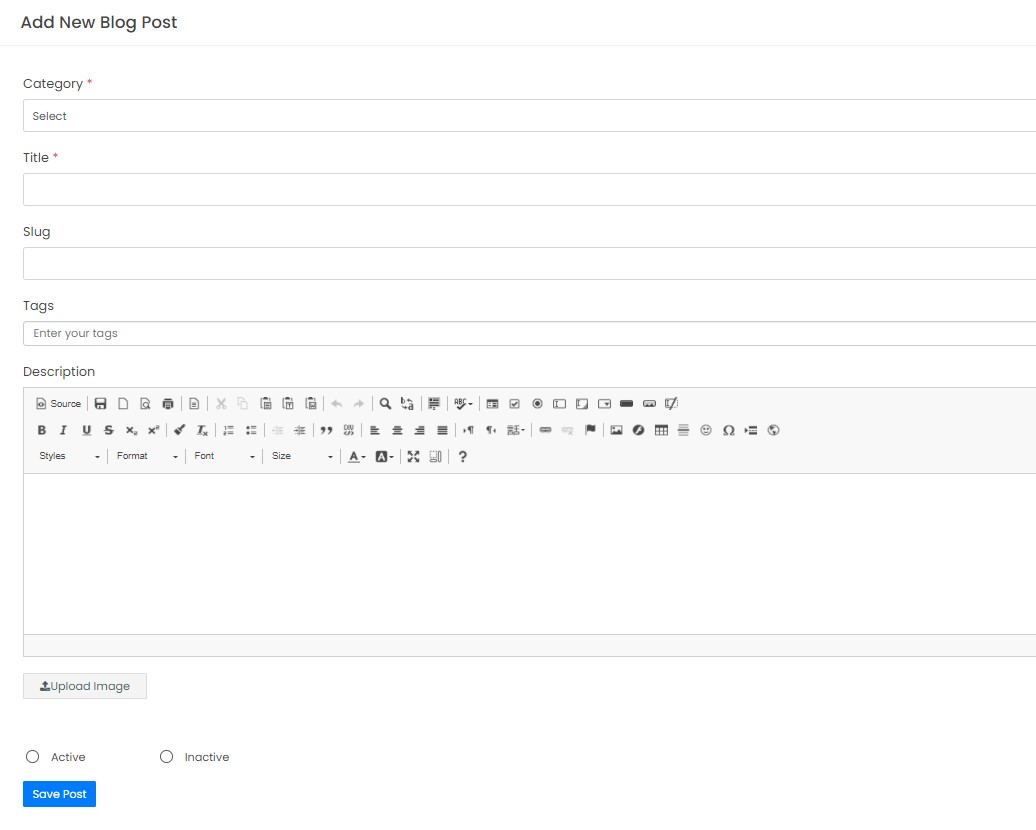
✓ Manage Blogs: If you want to add Blog first you need add Blog Category to go "Blog" section from left sidebar navigation and click on the "Add Category" options then you can add Category here in one page CRUD. And then Clink "Blog" section from left sidebar navigation to add "Blog".
User
✓ Manage Chambers: If you want to add Chambers you will see from left sidebar "Chambers" menu and here you will see this manage options when you click. And you can manage Chambers CRUD in an one pages.✓ Manage Staffs: If you want to manage your Staffs you will see from left sidebar "Staffs" menu and here you will see this manage options when you click. And you can manage Staffs CRUD in an one pages.
✓ Manage Patients: If you want to manage your Patients you will see from left sidebar "Patients" menu and here you will see this manage options when you click. And you can manage Patients CRUD in an one pages.
✓ Manage Departments: If you want to manage your Departments you will see from left sidebar "Departments" menu and here you will see this manage options when you click. And you can manage Departments CRUD in an one pages.
✓ Manage Drugs: If you want to manage your Drugs you will see from left sidebar "Drugs" menu and here you will see this manage options when you click. And you can manage Drugs CRUD in an one pages.
✓ Manage appointments: If you want to manage your appointments you will see from left sidebar "appointments" menu and here you will see this manage options when you click. And you can manage appointments CRUD in an one pages.
✓ Prescriptions Settings: Before creating your first prescrition you can create your "A"
✓ Manage Prescriptions: If you want to manage & add "Prescriptions" you need to click "Prescriptions" section from left sidebar there you see your all Prescriptions list and if you want to create new prescription then click on the "New Prescription" button from top.
✓ Manage Profile, Education & Experiences: If you want to manage & add "Profile, Education & Experiences" you need to click "Profile" section from left sidebar there you see your all option in there.
Staff
Staff can access only selected chambers which is assigned by the user. They can access Prescription settings, patients, drugs, appointments & dr profiles but they will not delete any data from their panelPatient
When you create a patient or assign a patient for your prescription & apinments our system automatically generate a patient panel access like belowUsername: Patient mobile no
Password: 1234
✓ Patient appointments: After login patient panel they can see their all appointments from left sidebar "appointments" sections
✓ Patient Prescriptions: After creating a prescription for your patients they will see their prescriptions in their panel they can also print prescription from there.
Admin Panel
4)Manage Website Settings - top
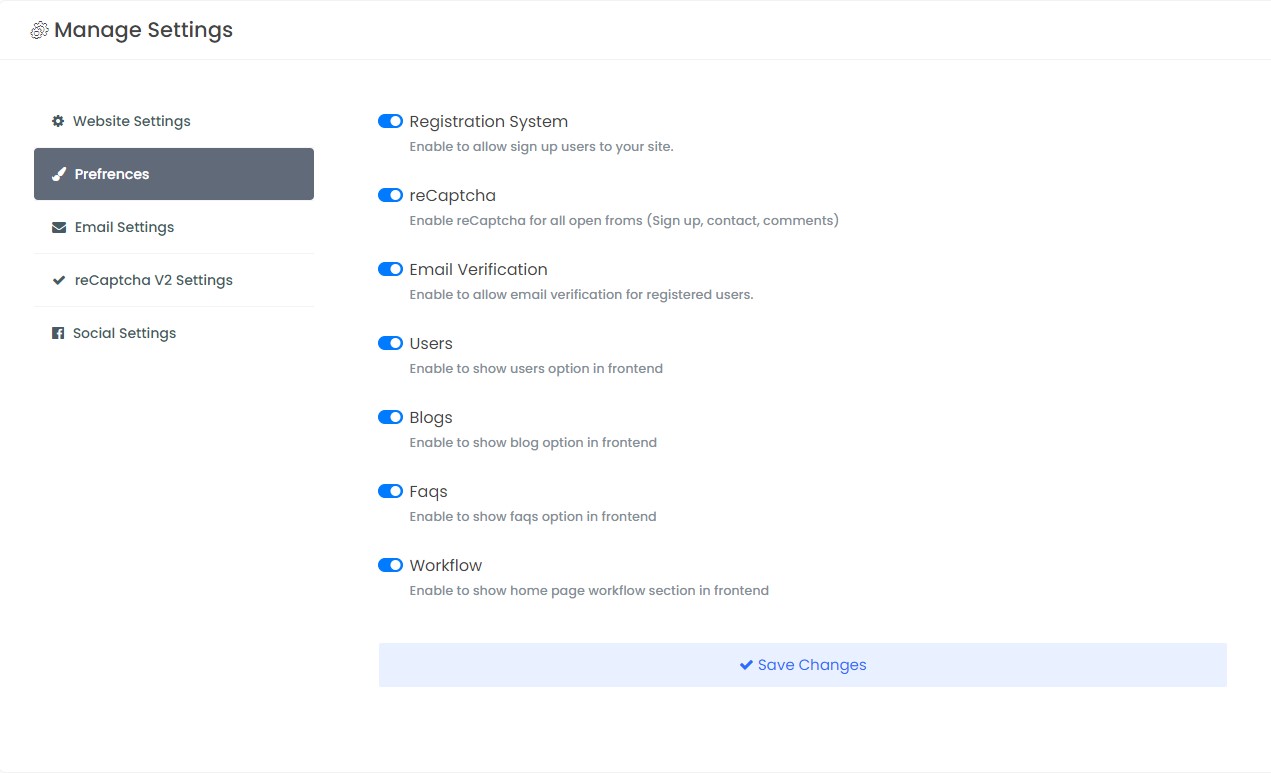
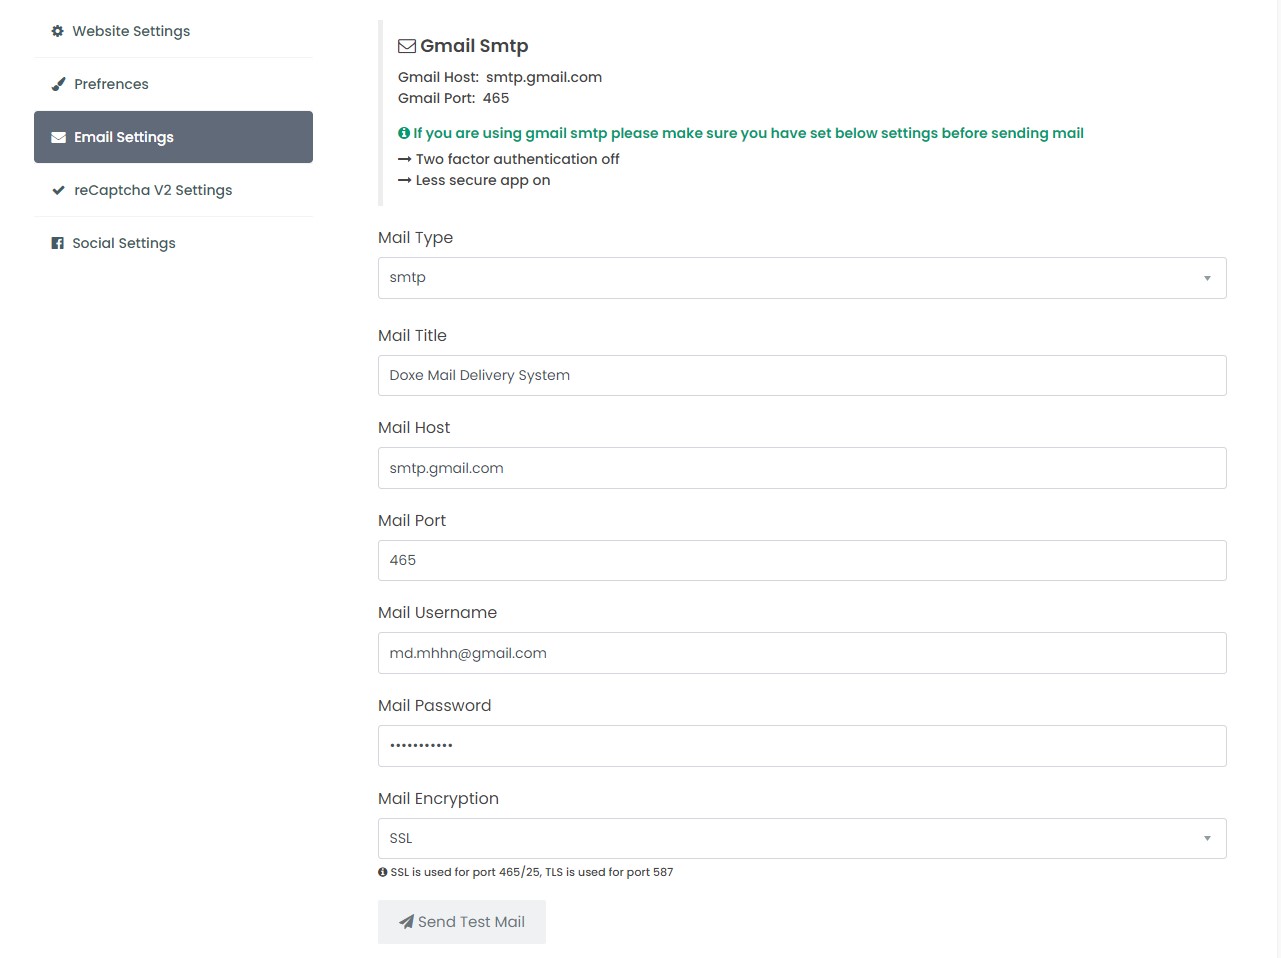
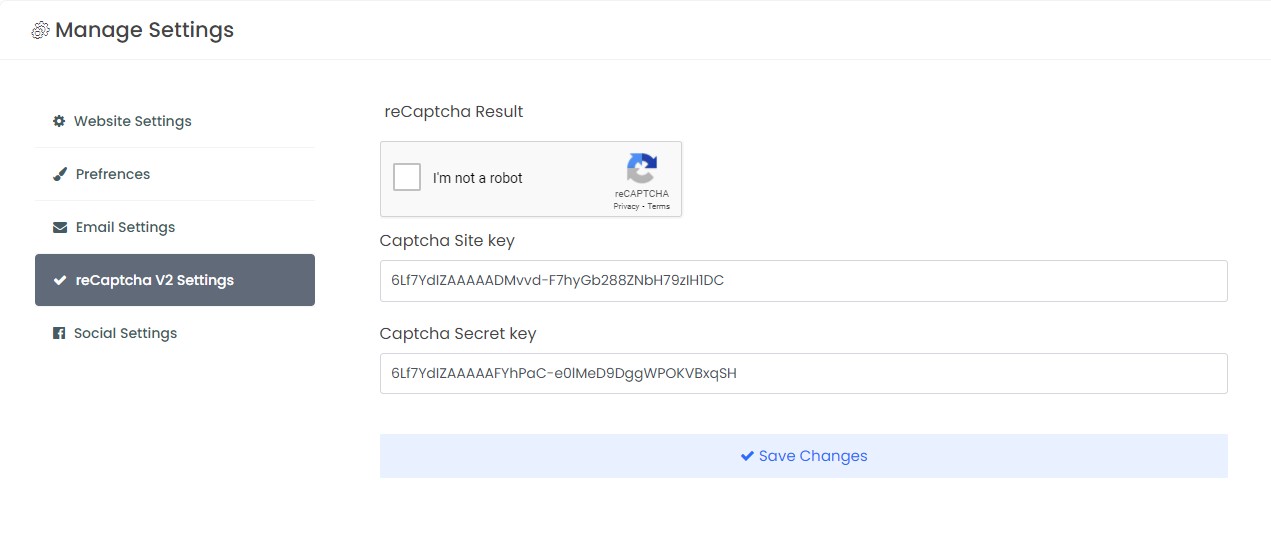
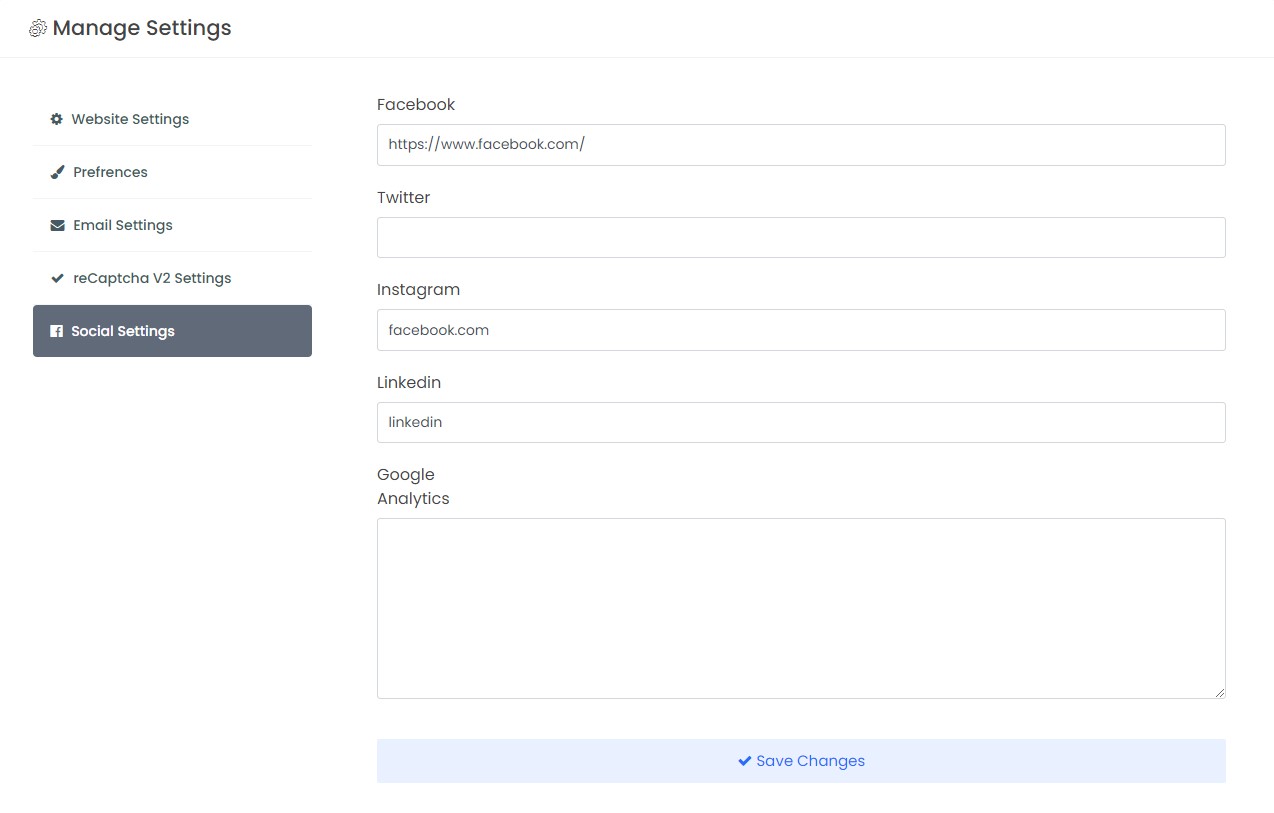
✓ Manage Website Settings: From left sidebar > Dashboard > Settings you can manage site name, title, email, phone, about, logo, favicon, emails, basic seo options, social links, SMTP emails, preferences & reCaptcha.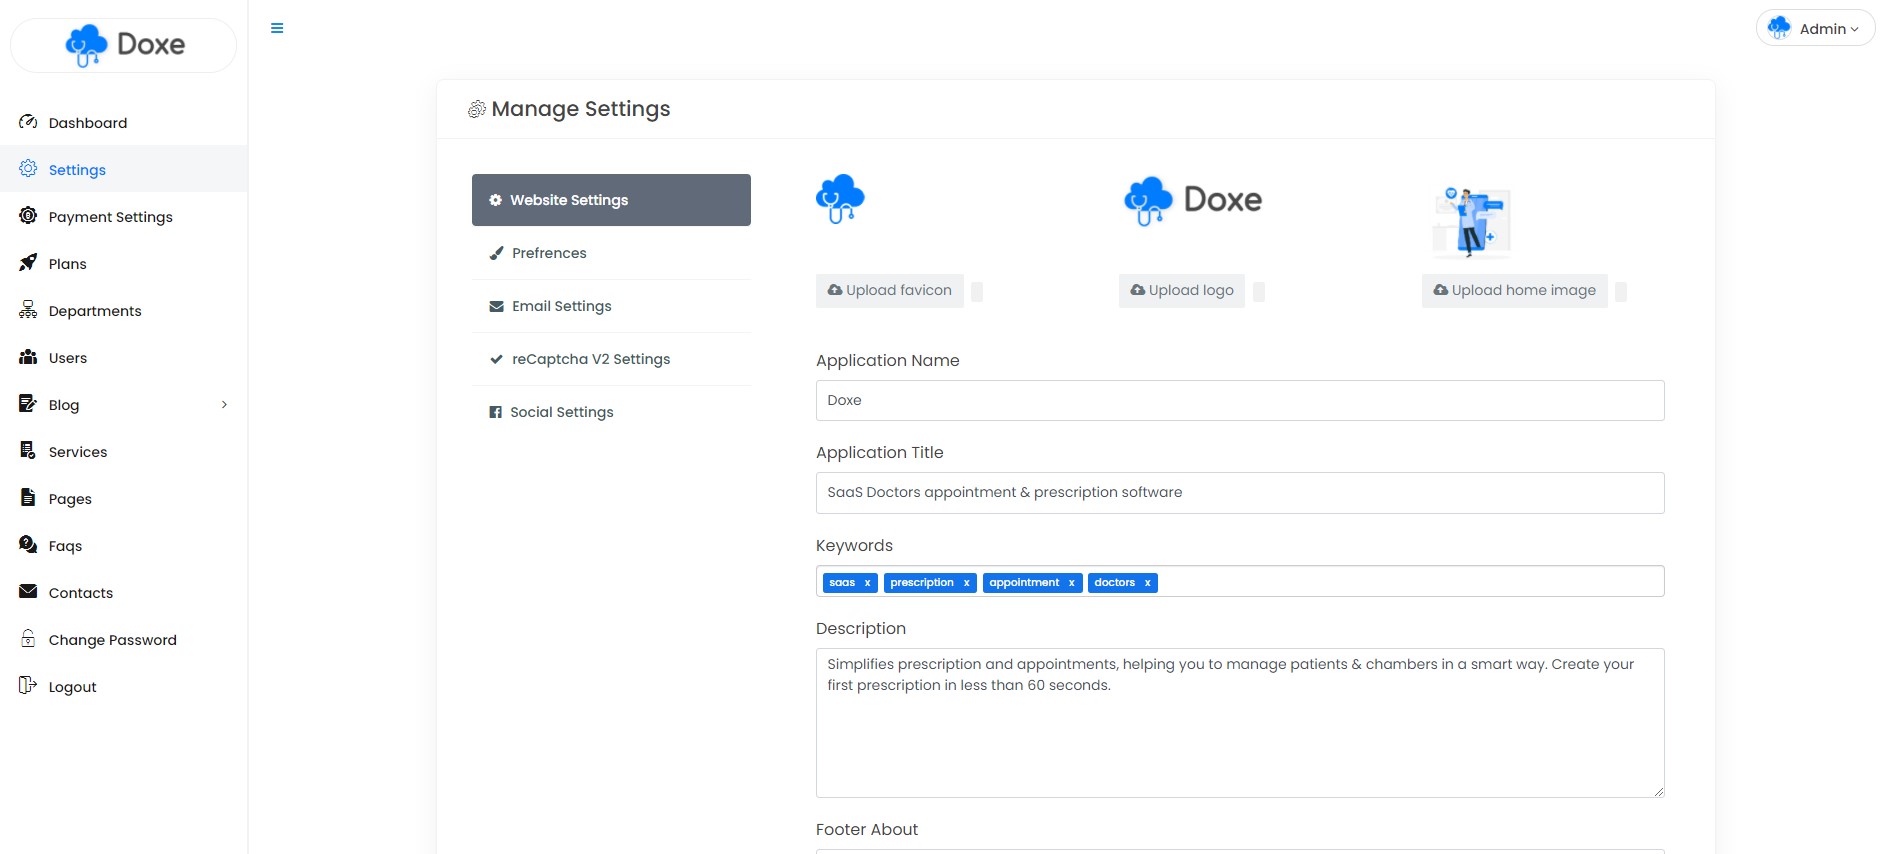
5)Payment Settings - top
✓ Payment Settings: From left sidebar > Dashboard > Payment Settings you can manage currency, paypal & stripe payment method. You can also receive offline payment from this sections.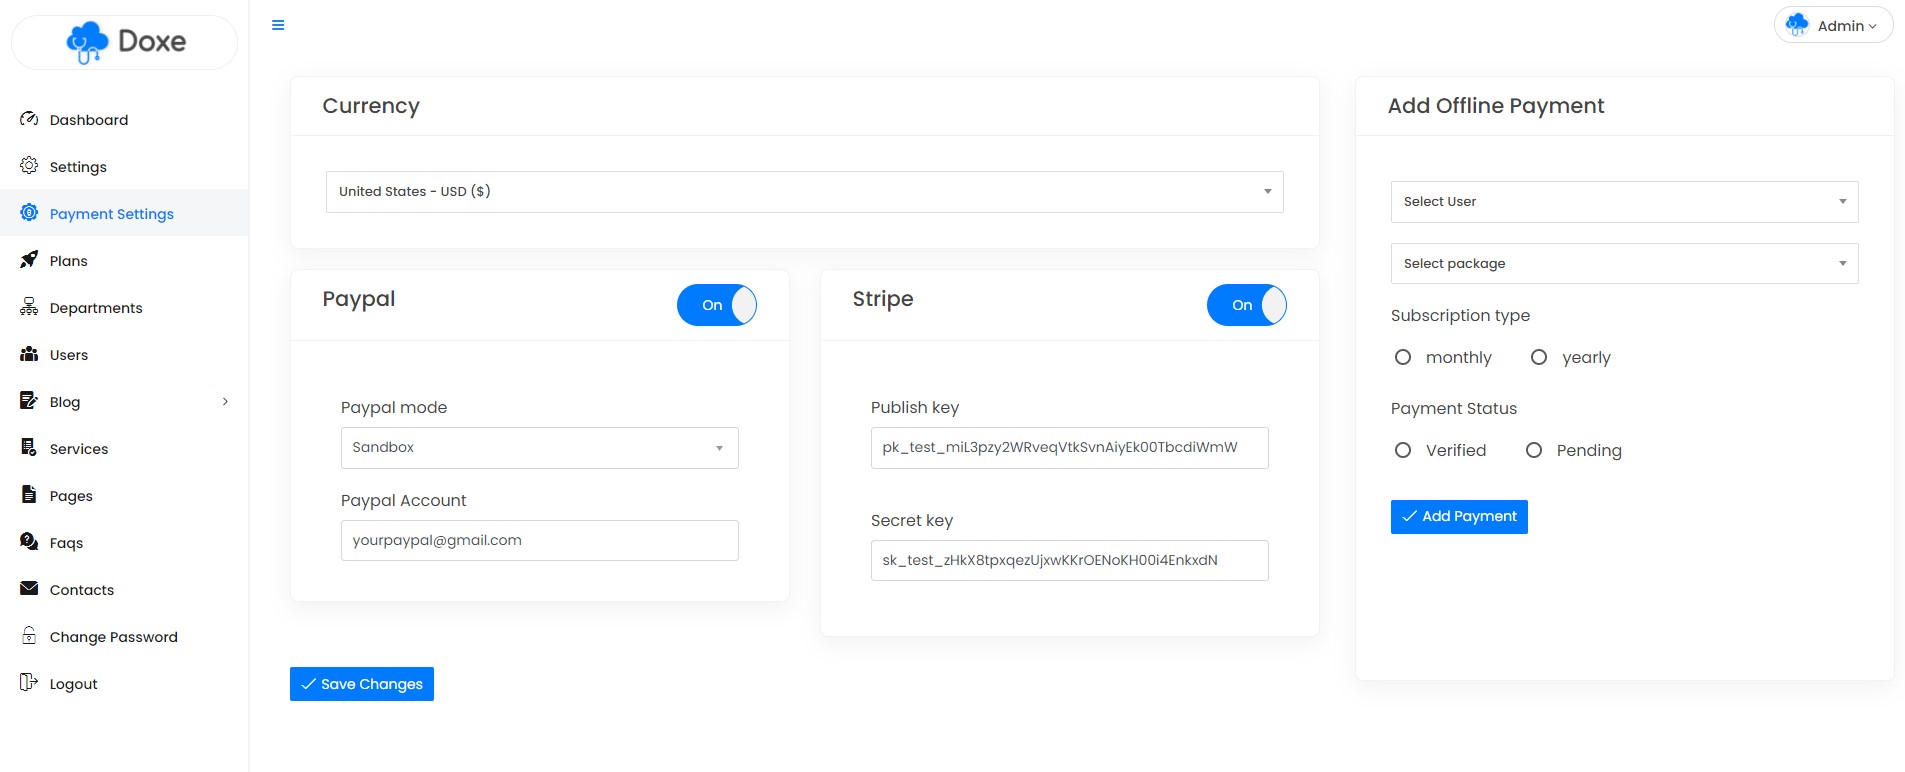
6)Manage Users - top
✓ Manage Users: From left sidebar > Dashboard > Users you can manage all users here.
7)Manage Services - top
✓ Manage Services: From left sidebar > Dashboard > Services you can manage your product Services for home pages.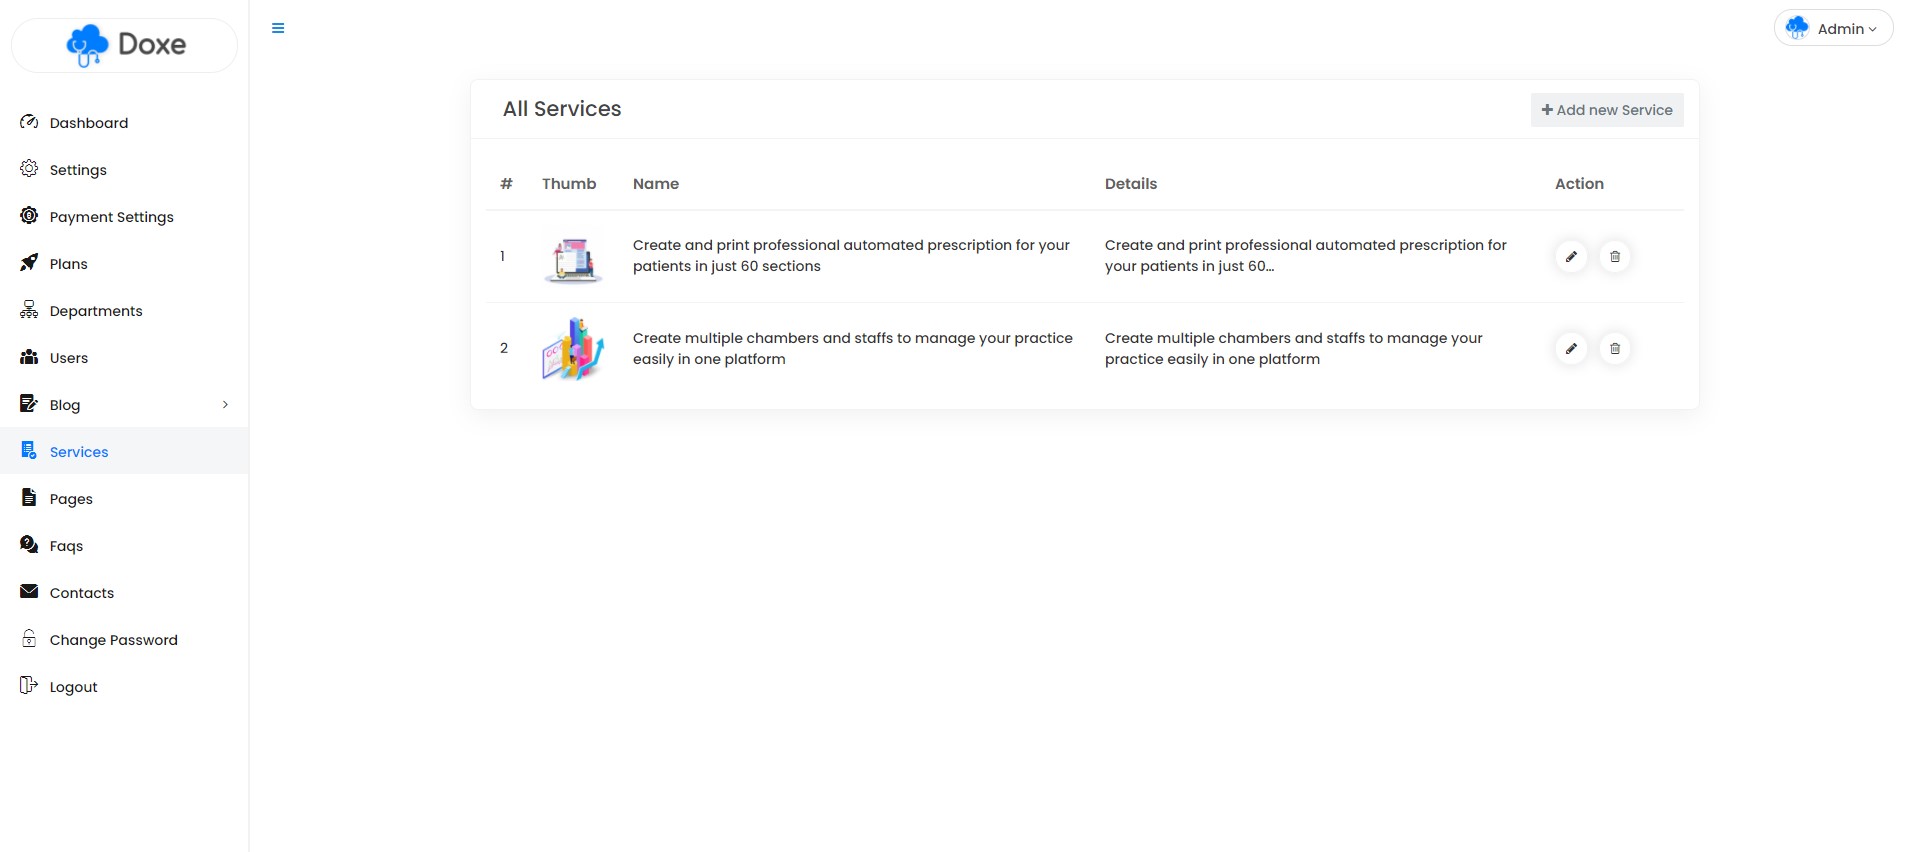
8)Manage Plans - top
✓ Manage Plans: From left sidebar > Dashboard > Plans you can manage your site packages & feature limits here.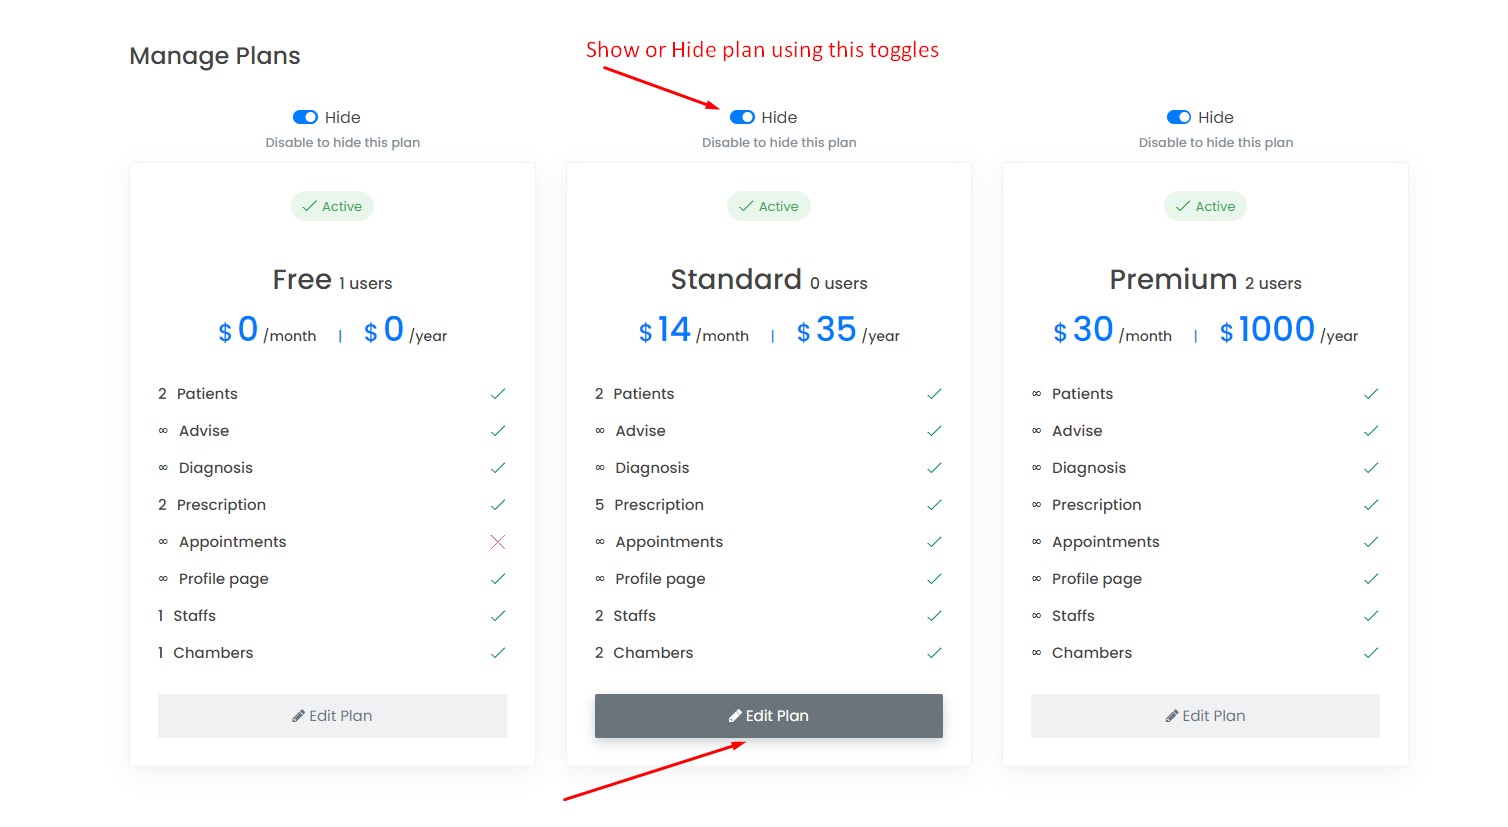
9)Manage Pages - top
✓ Manage Pages: From Dashboard > Pages you can add, edit & Delete unlimited pages .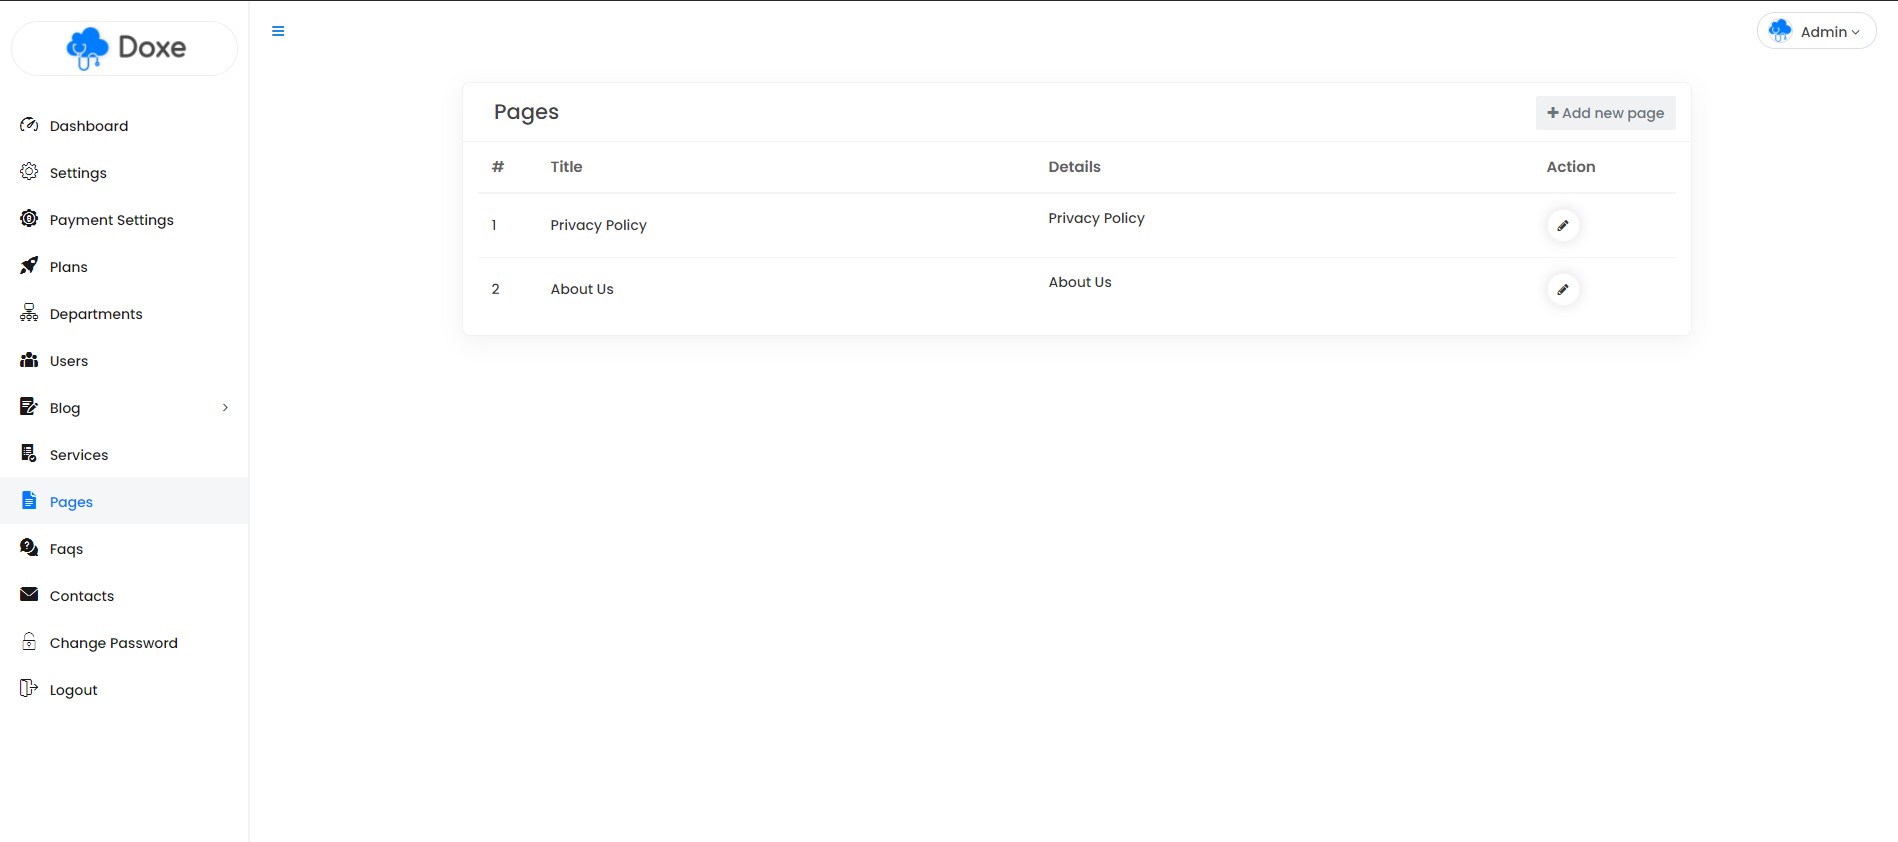
10)Manage Faqs - top
✓ Manage Faqs: From Dashboard > Faqs you can add, edit & Delete unlimited Faqs .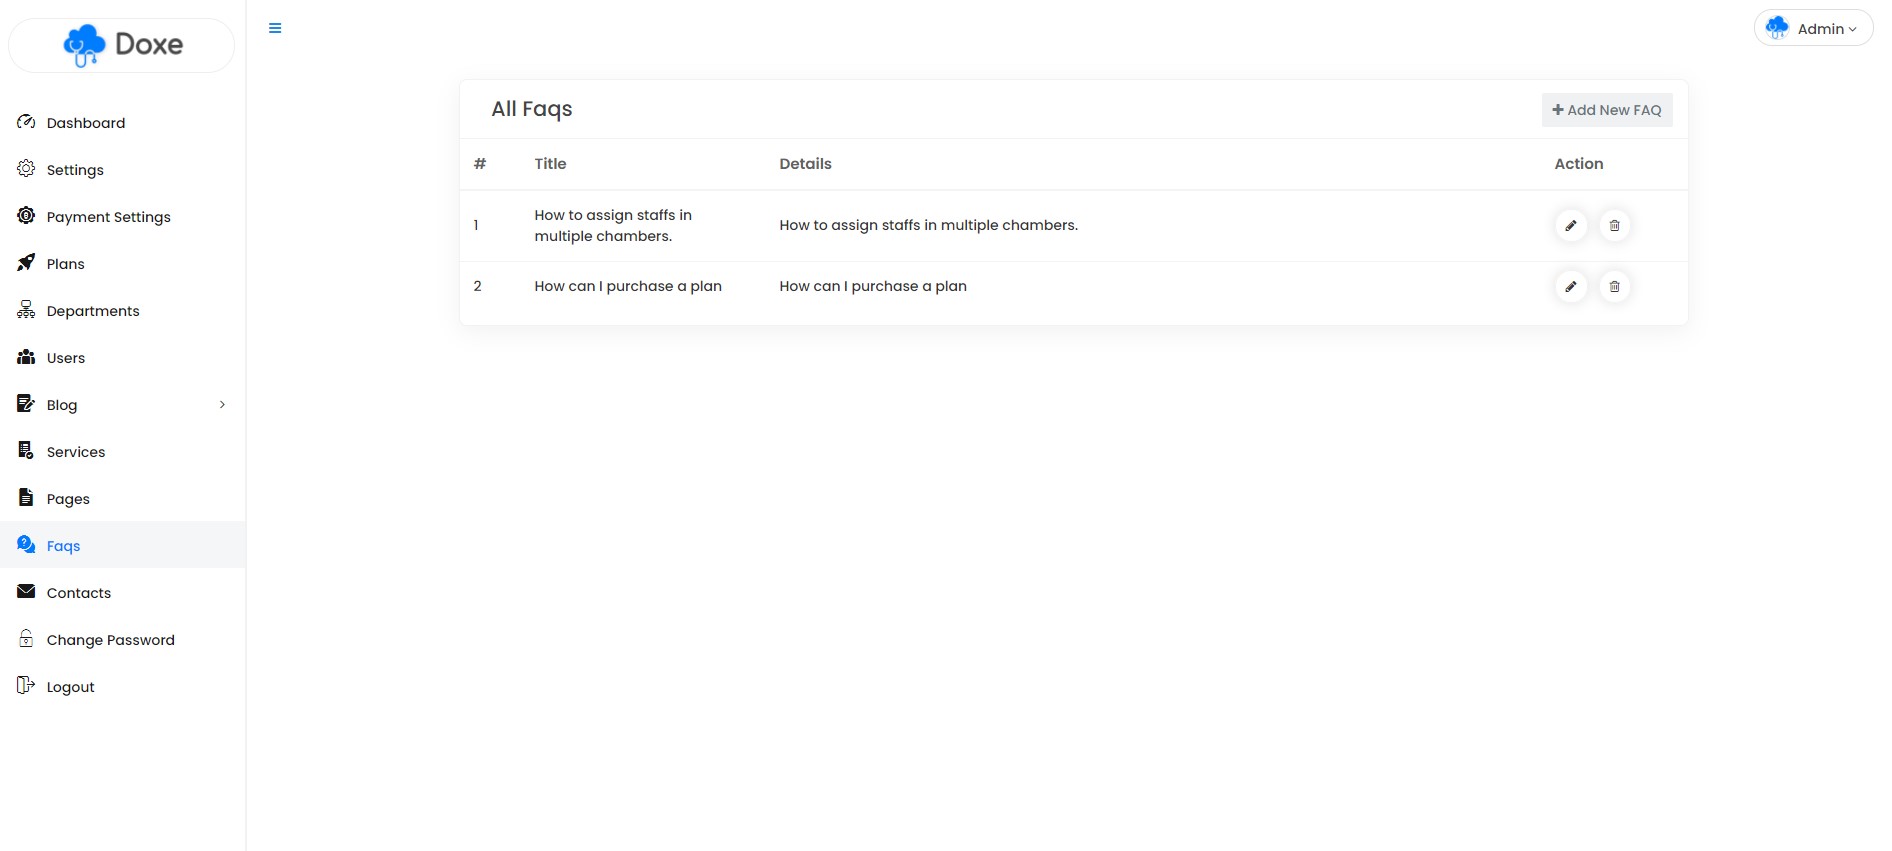
11)Manage Blogs - top
'Blog' section from dashboard sideber you can add Blog Category from navigation.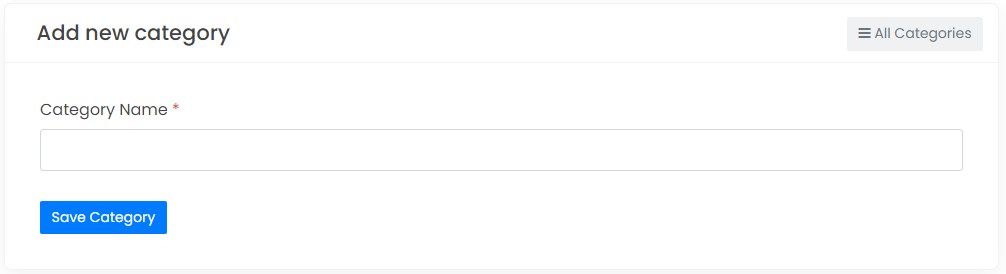
✓ Add Blog: From Dashboard > Blog > Blog: you can Add, Edit, Delete, Activate or Deactivate Blog from this option.
12)Add Cron Jobs for expire payments - top
For auto check your expire payments for once a day you can set a cron job to manage this options. Follow the steps:Step 1: Go to your Cpanel and click cron jobs.
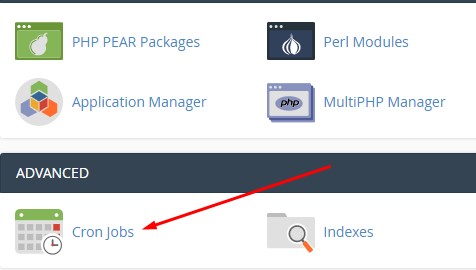
Step 2: Add new cron job.
Select an option.
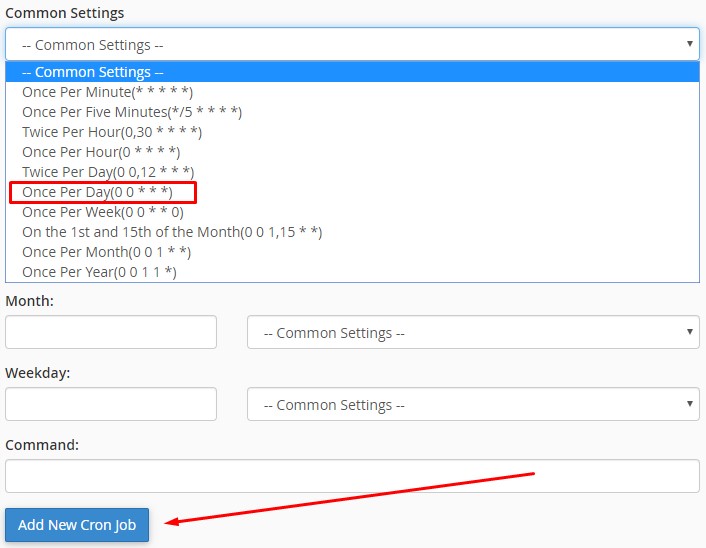
Add below command to your cron command line:
wget http://yourdomain.com/cron/expire_payments
Click Add New Cron Job button.
User Panel
13)Subscriptions - top
'Subscriptions' section from dashboard sidebar you upgrade your plan from here to click select button from any plans.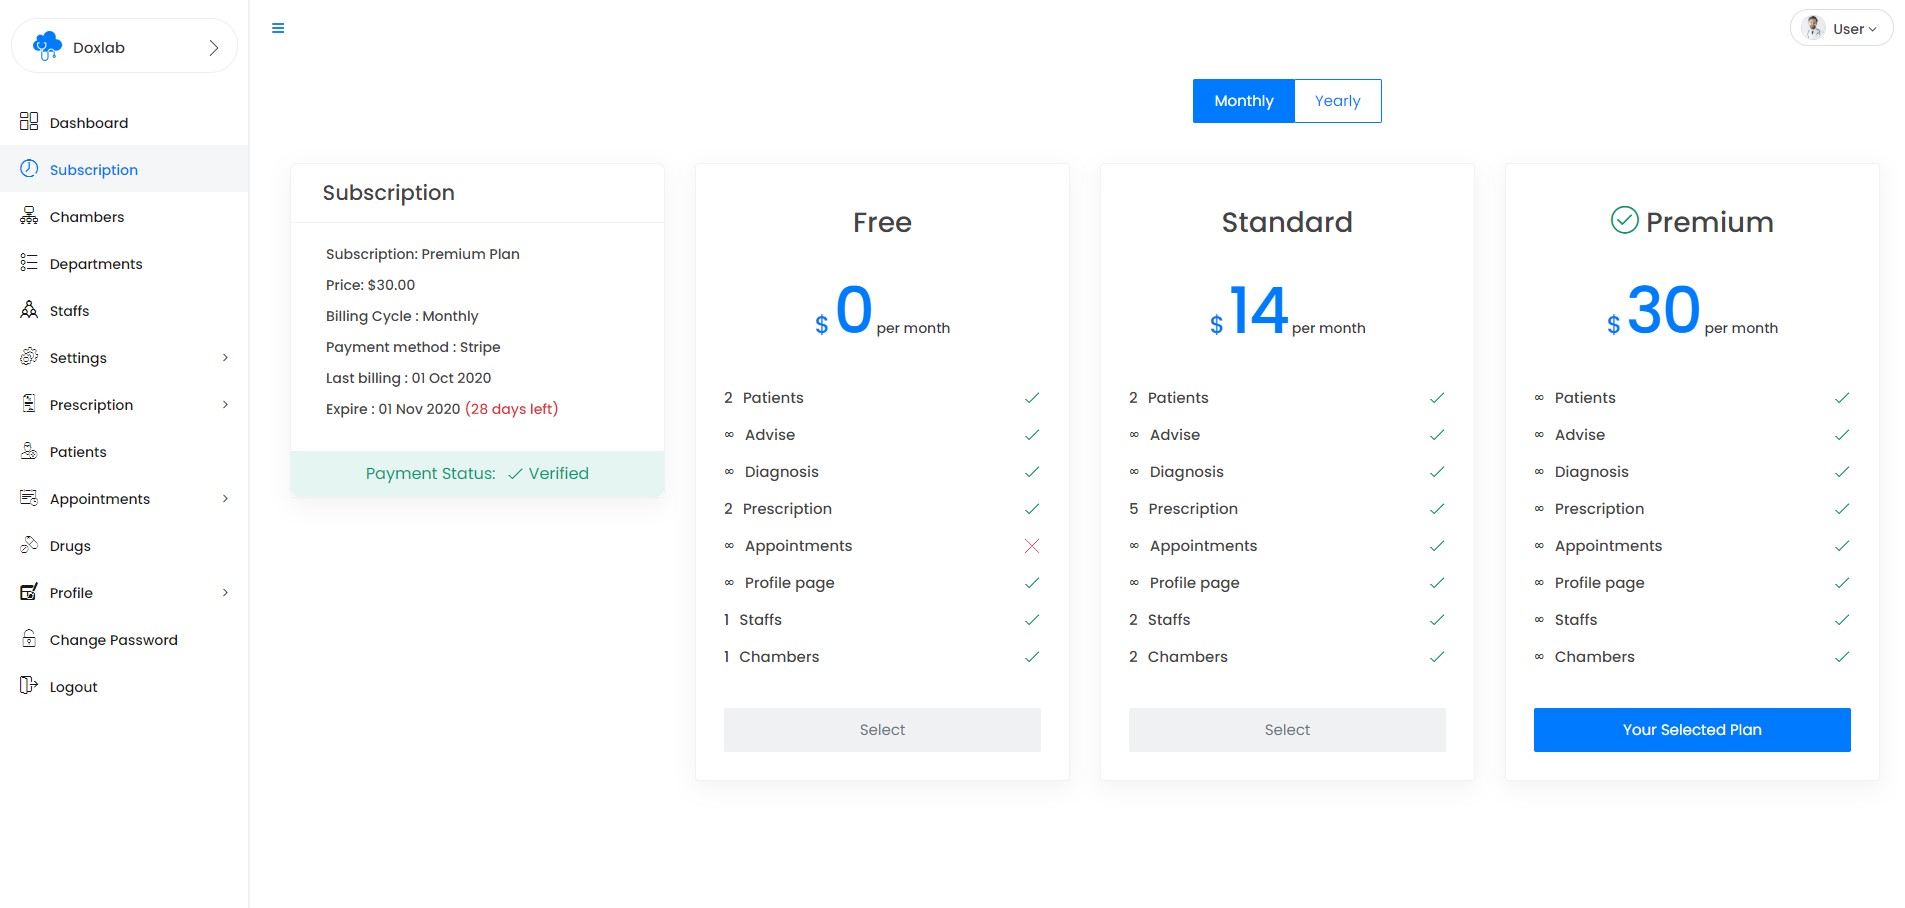
14)Manage Chambers - top
'Chambers' section from dashboard sidebar you can add, edit, delete chambers.
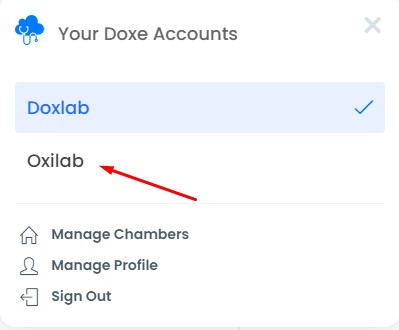
Set default chamber
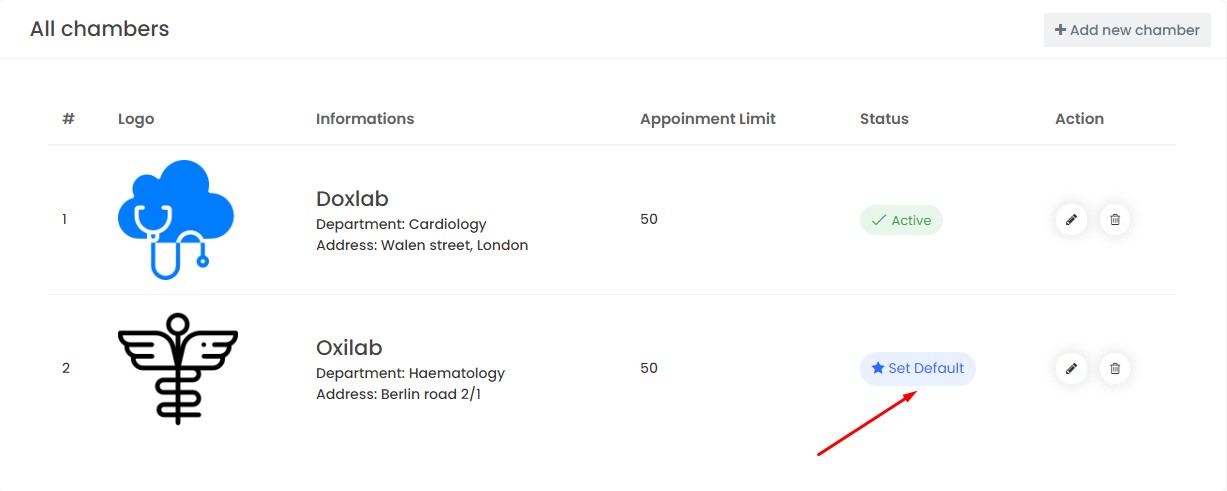
Switch chamber
15)Manage Staffs - top
'Staffs' section from dashboard sidebar you can add, edit, delete Staffs.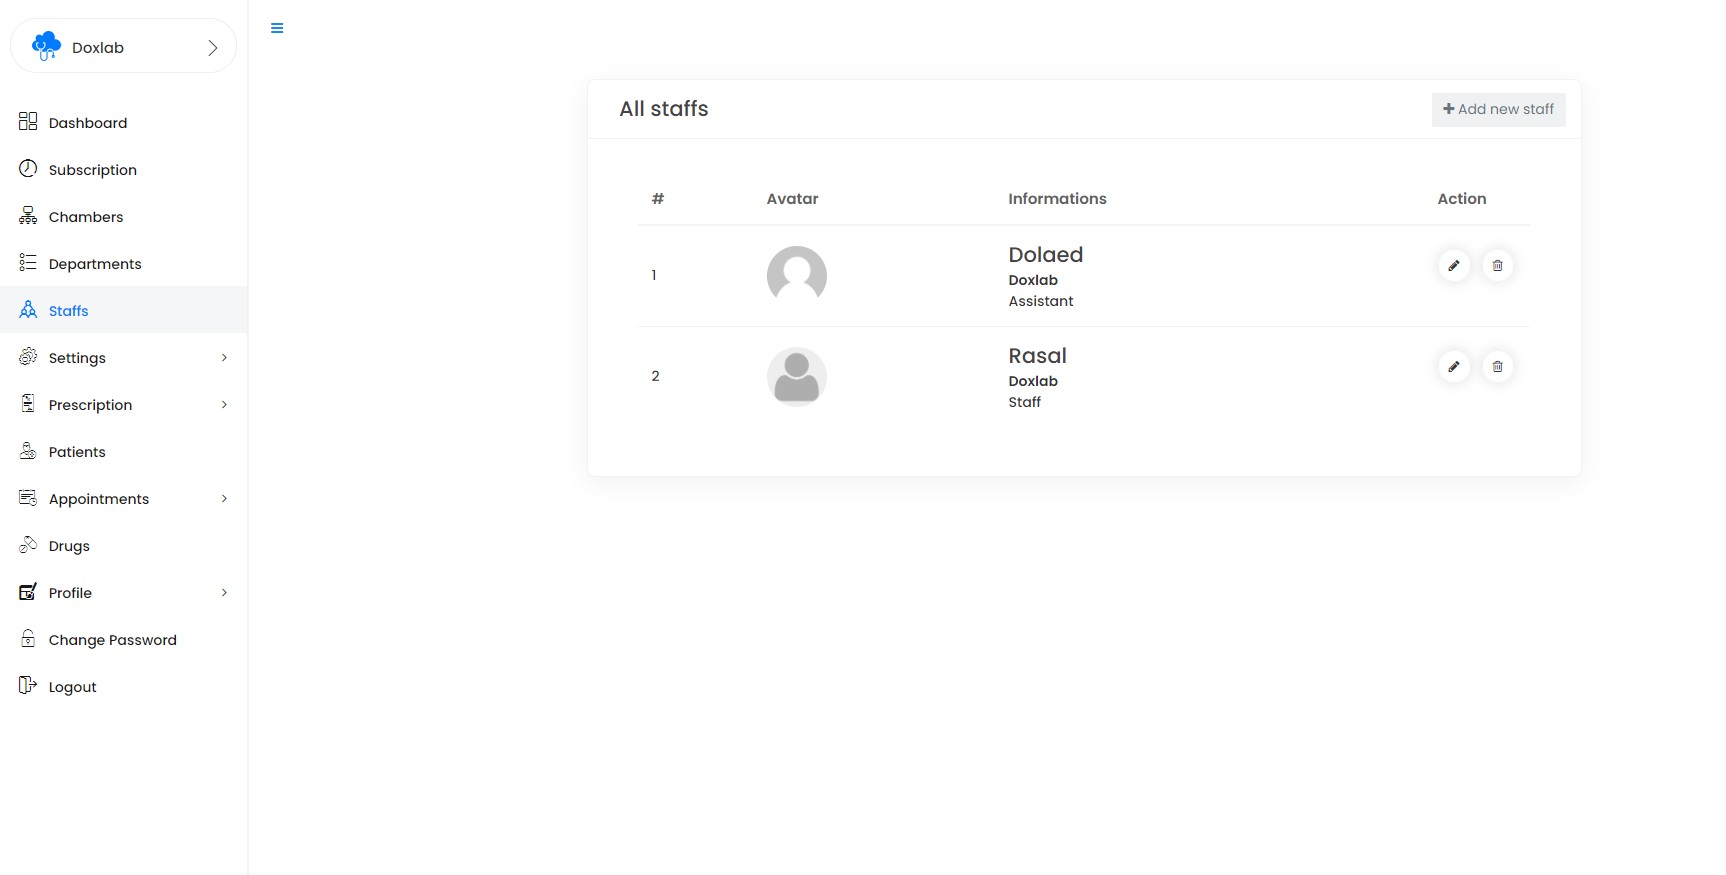
16)Manage Departments - top
'Departments' section from dashboard sidebar you can add, edit, delete Departments.
17)Manage Patients - top
'Patients' section from dashboard sidebar you can add, edit, delete Patients.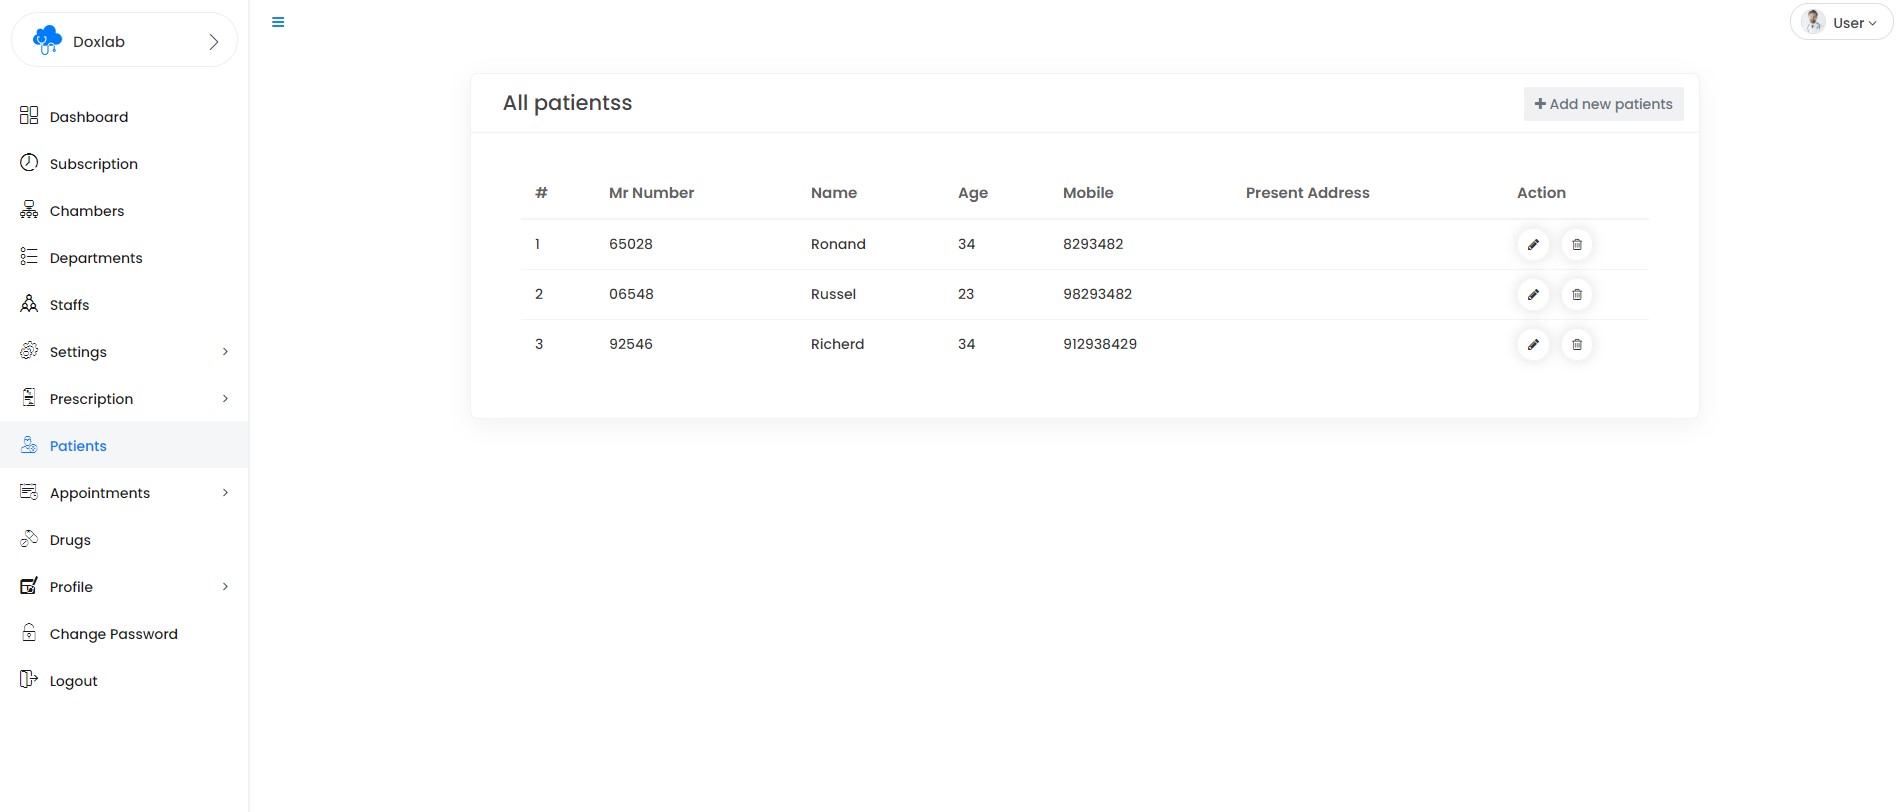
18)Manage Drugs - top
'Drugs' section from dashboard sidebar you can add, edit, delete Drugs.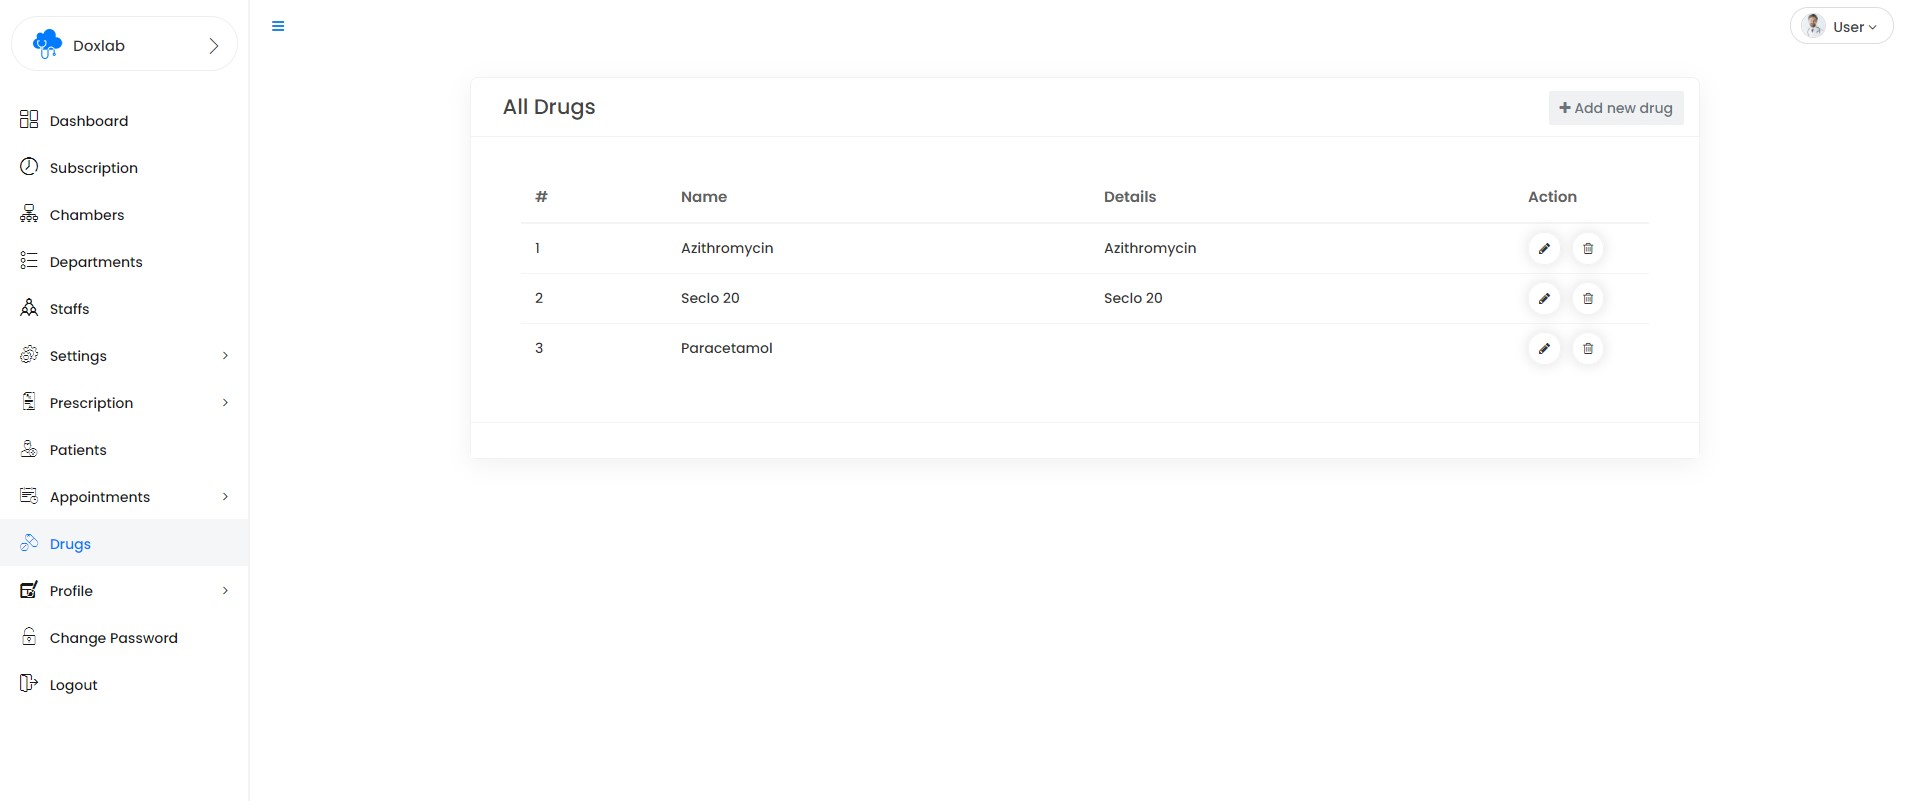
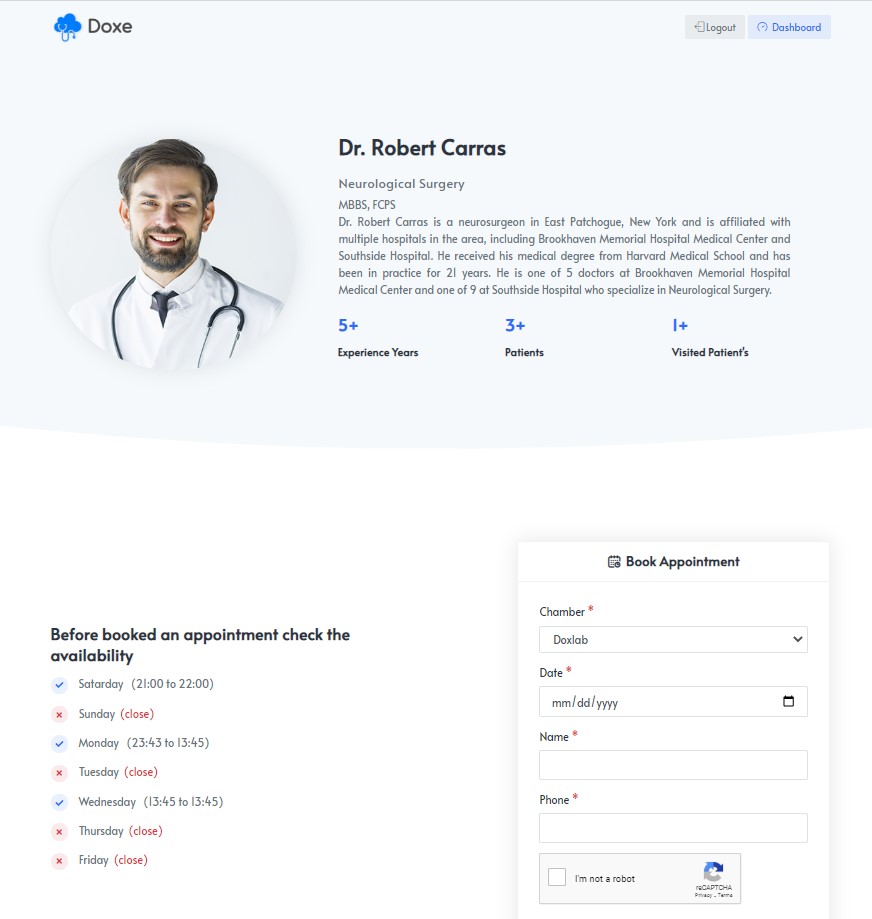
19)Booking Appointments - top
Assign appointment Schedule

Your users can can book appointment in 2 ways
1. Using user/doctors profile url
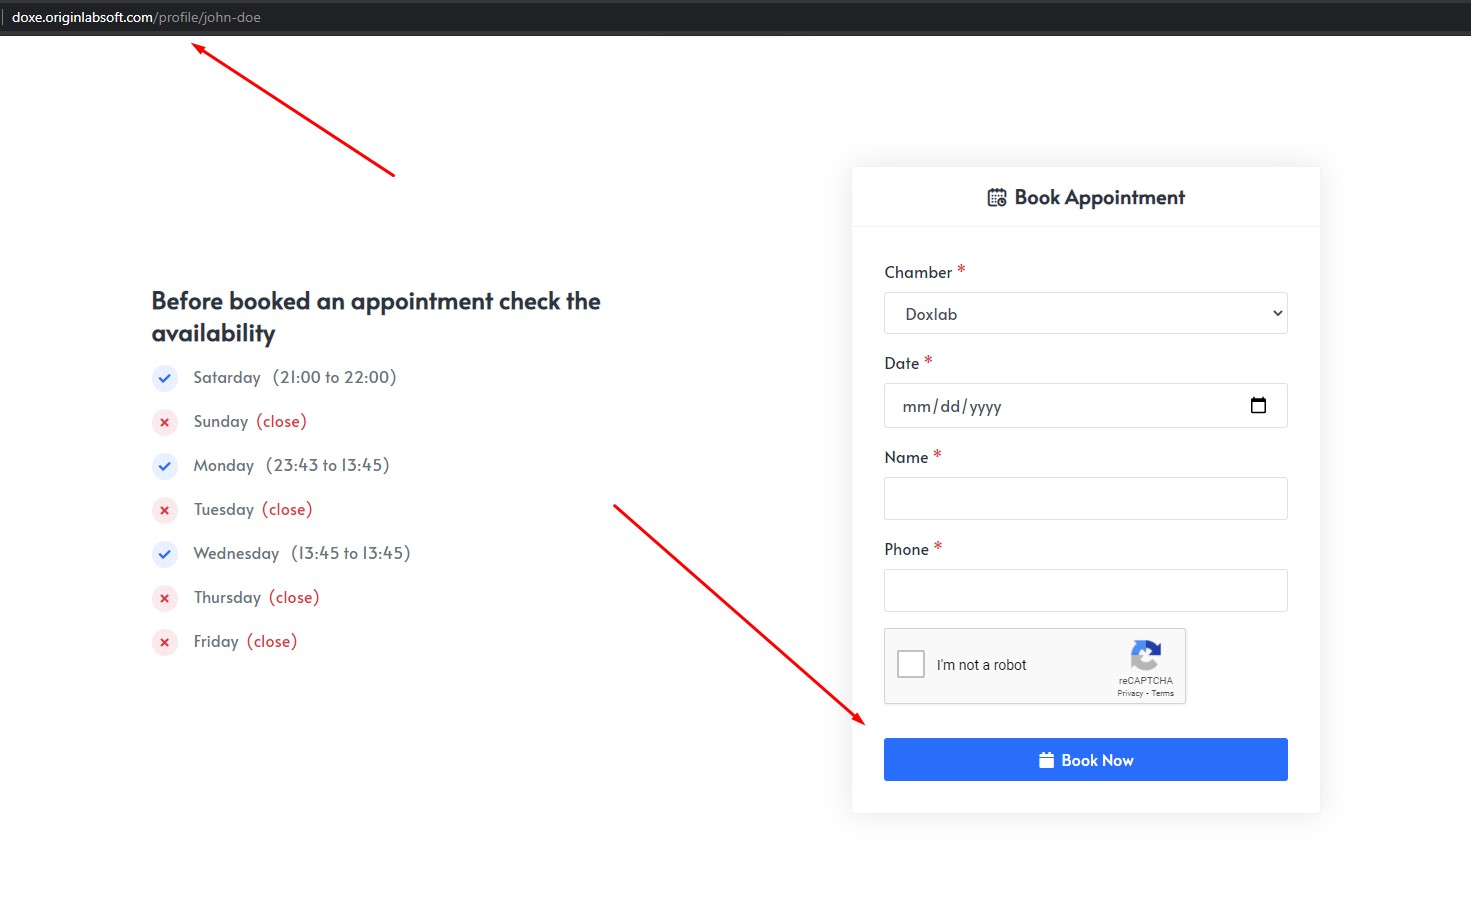
2. Manually assign patient inside user dashboard
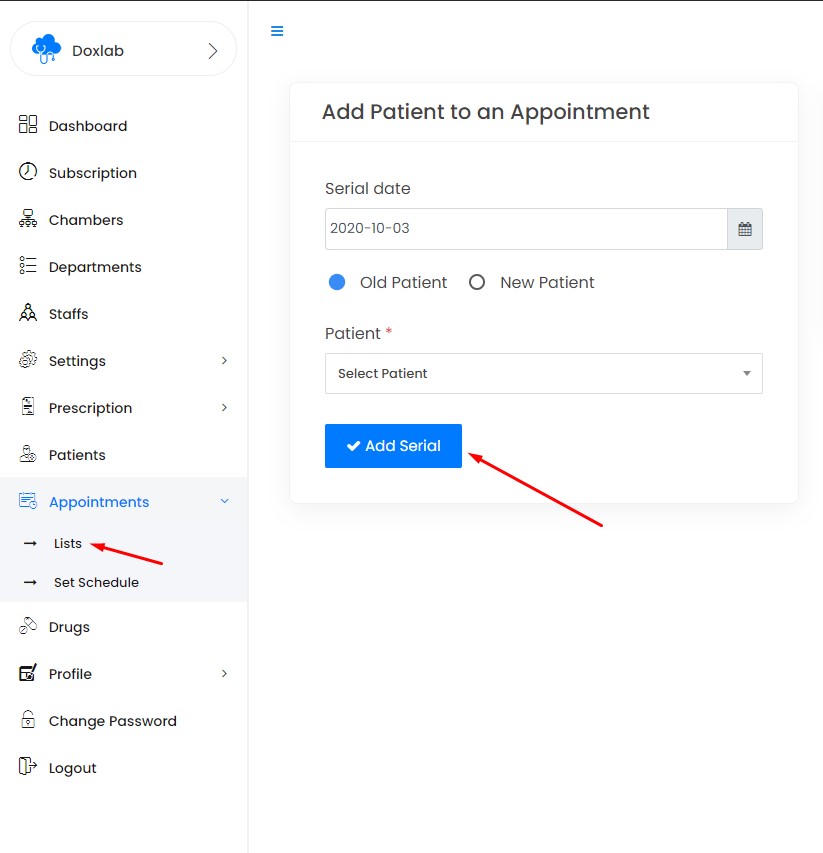
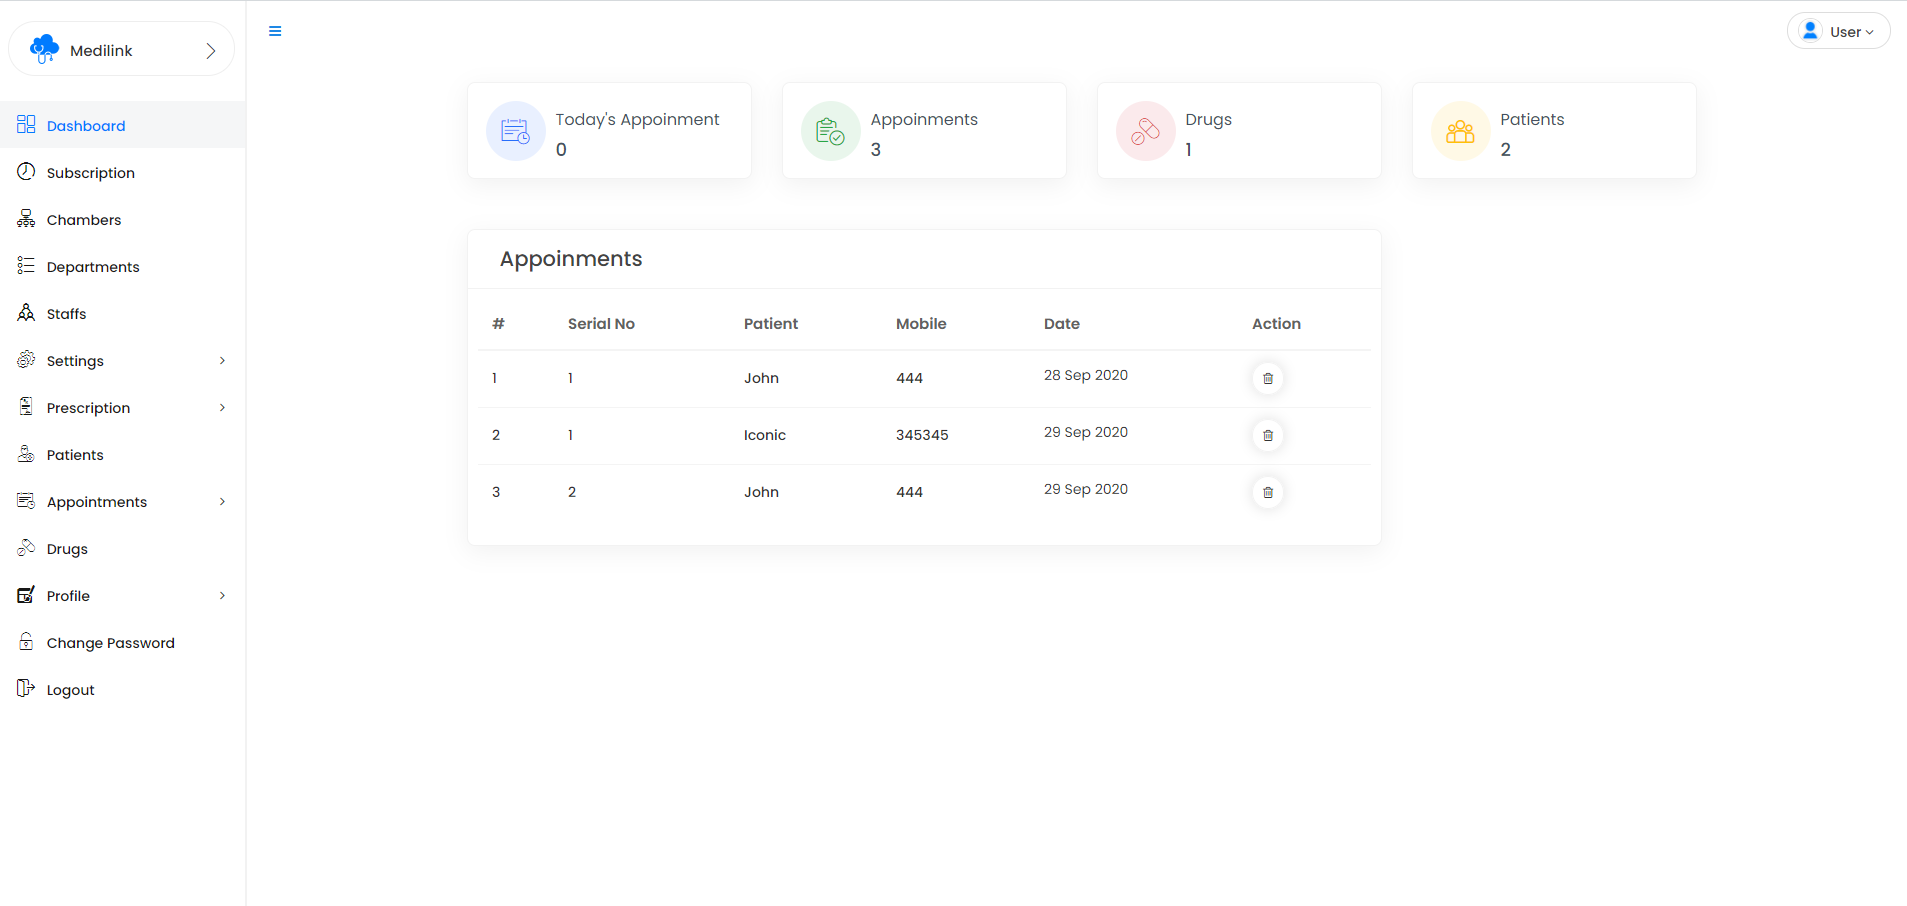
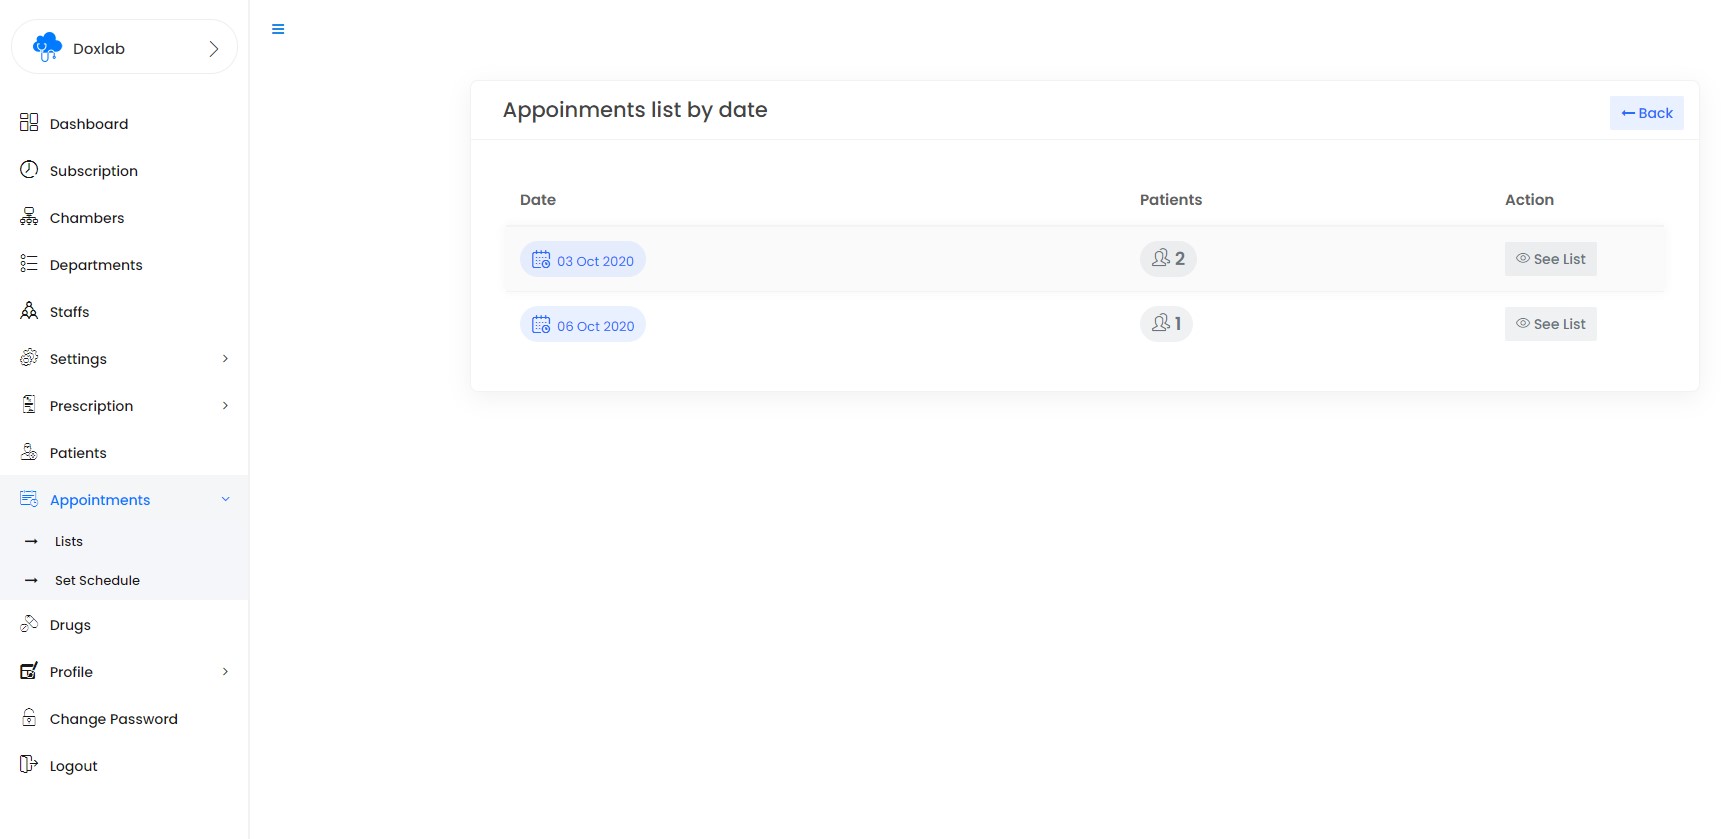
20)Manage Appointments - top
Daily Appoinments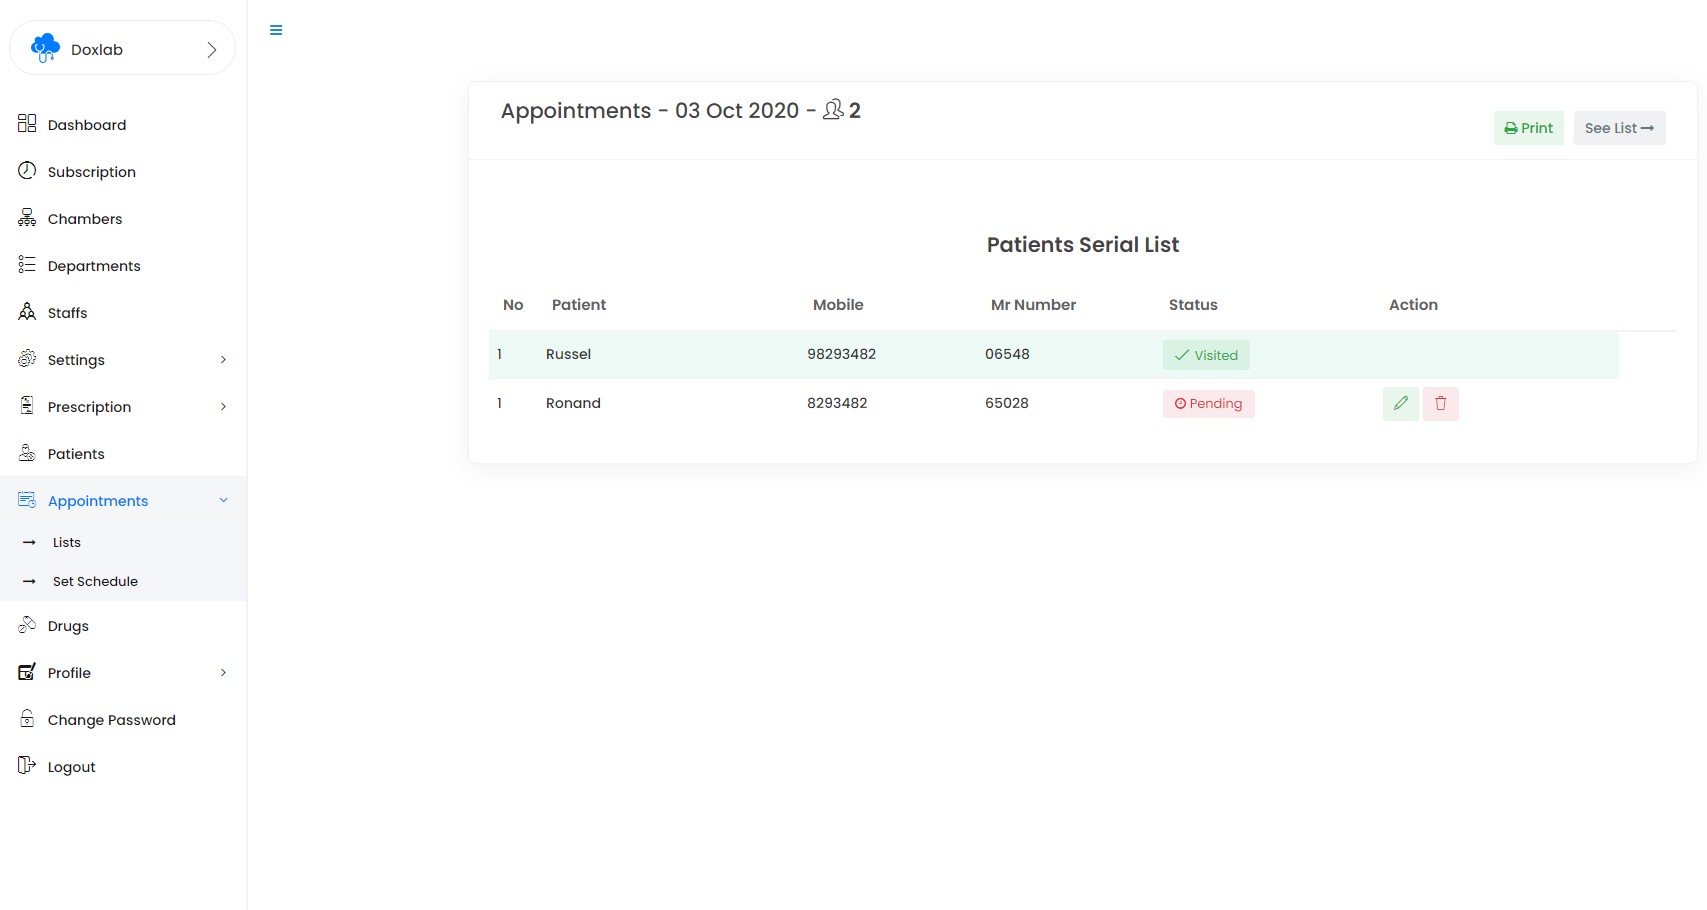
Date wise Appoinments
21)Prescriptions Settings - top
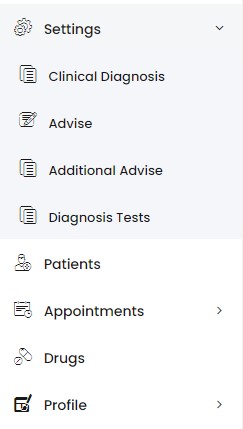
'Prescription Settings' section from dashboard sidebar you can add, edit, delete Clinical Diagnosis, Advises, Additional advise & Diagnosis reports.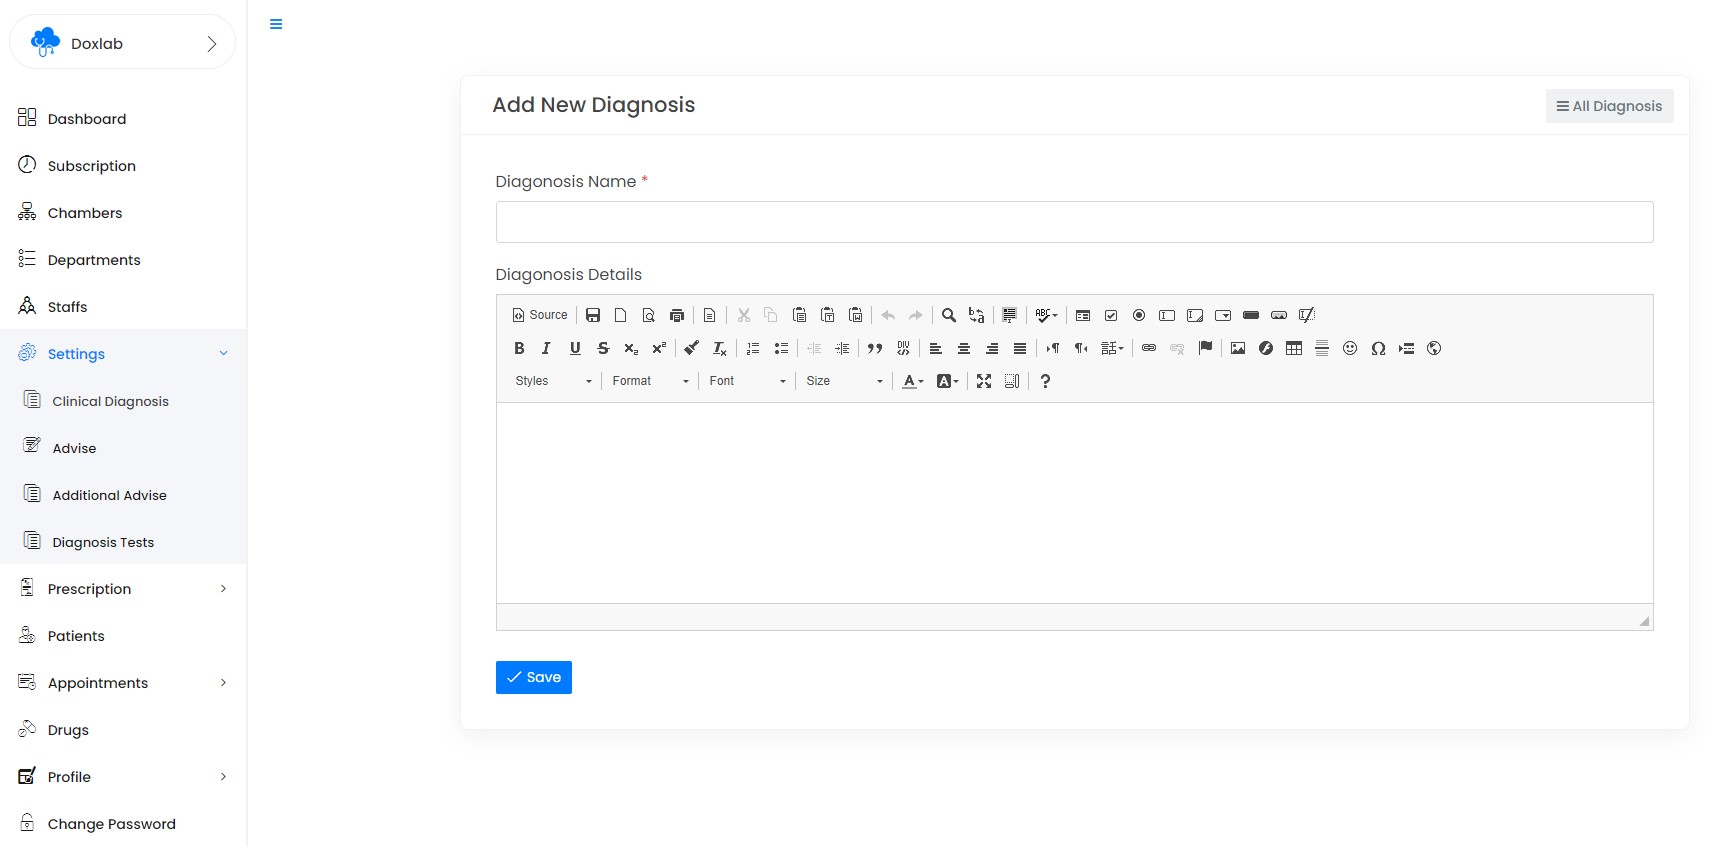


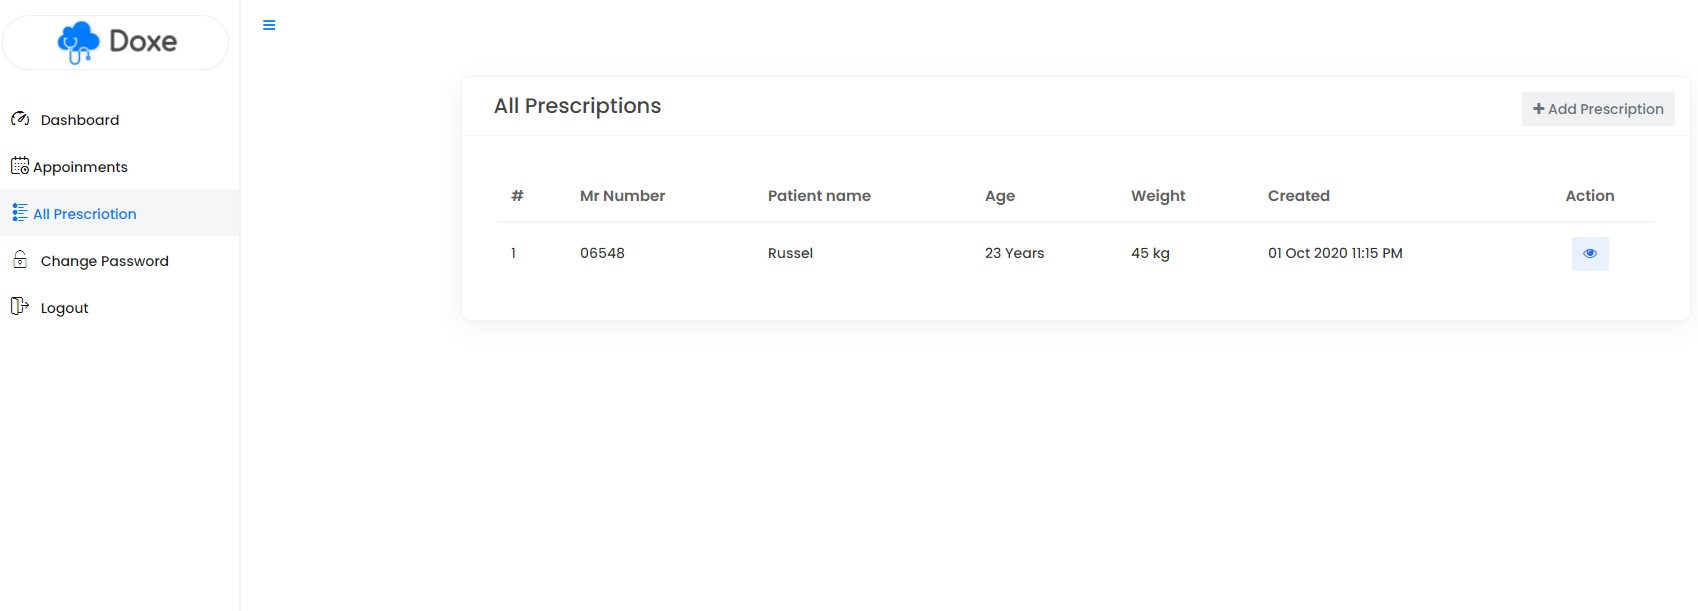
22)Manage Prescriptions - top
'Prescriptions' section from dashboard sidebar you can add, edit, delete Prescriptions.
You can also create prescriptions from daily appointments.

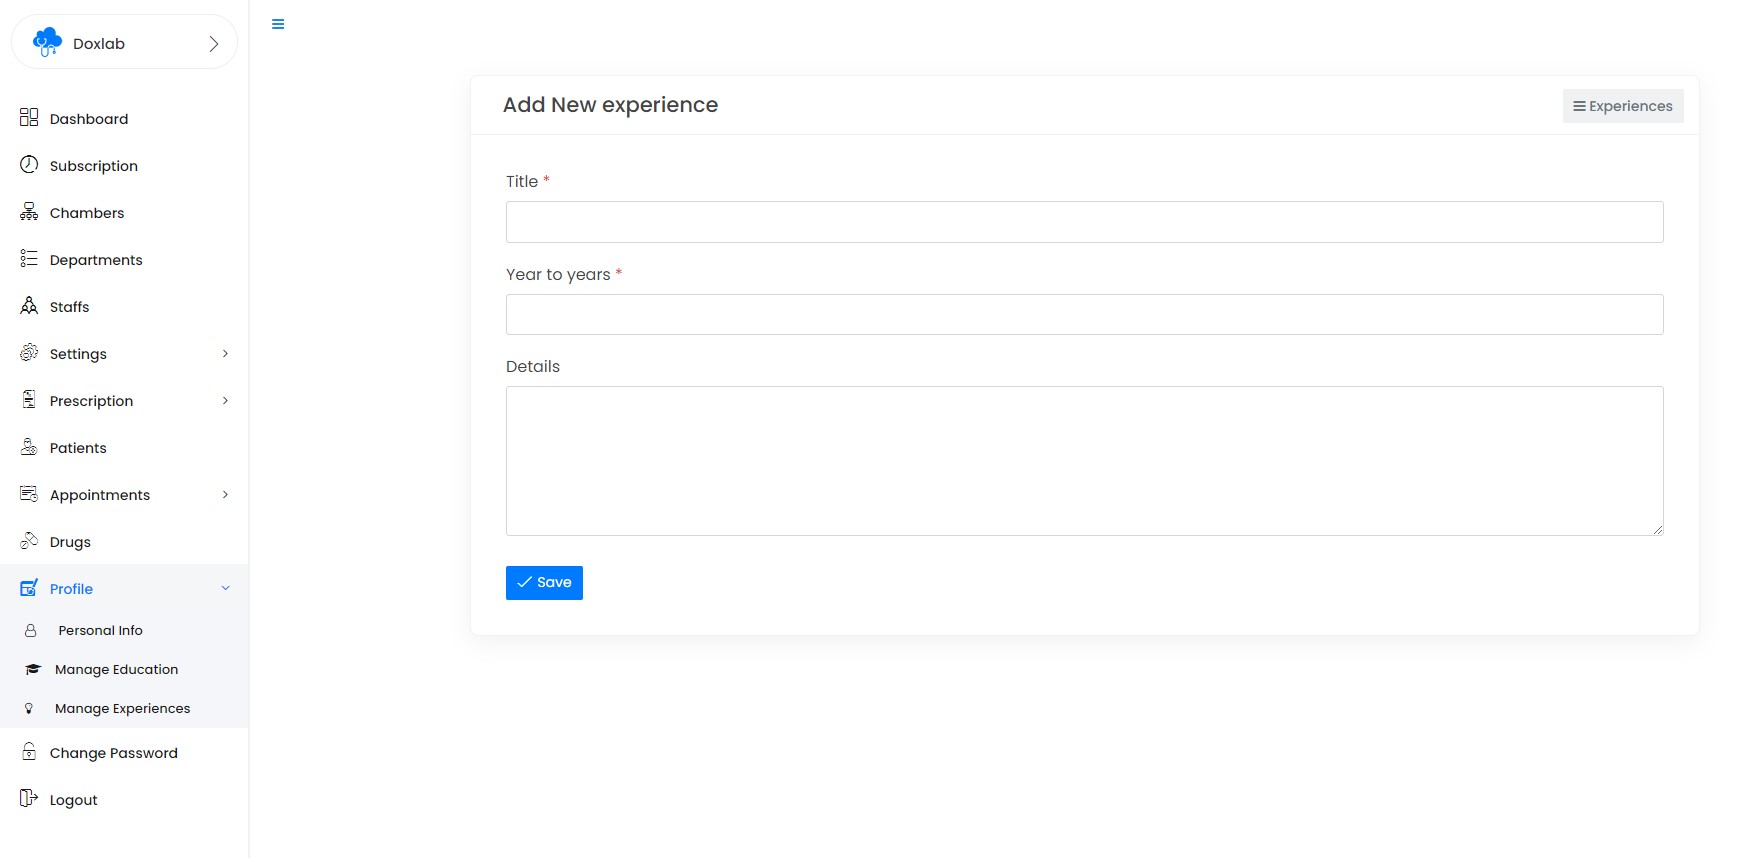
23)Manage Profile - top

'Profile' section from dashboard sidebar you can manage your profile, educations & experiences.
Profile

Educations
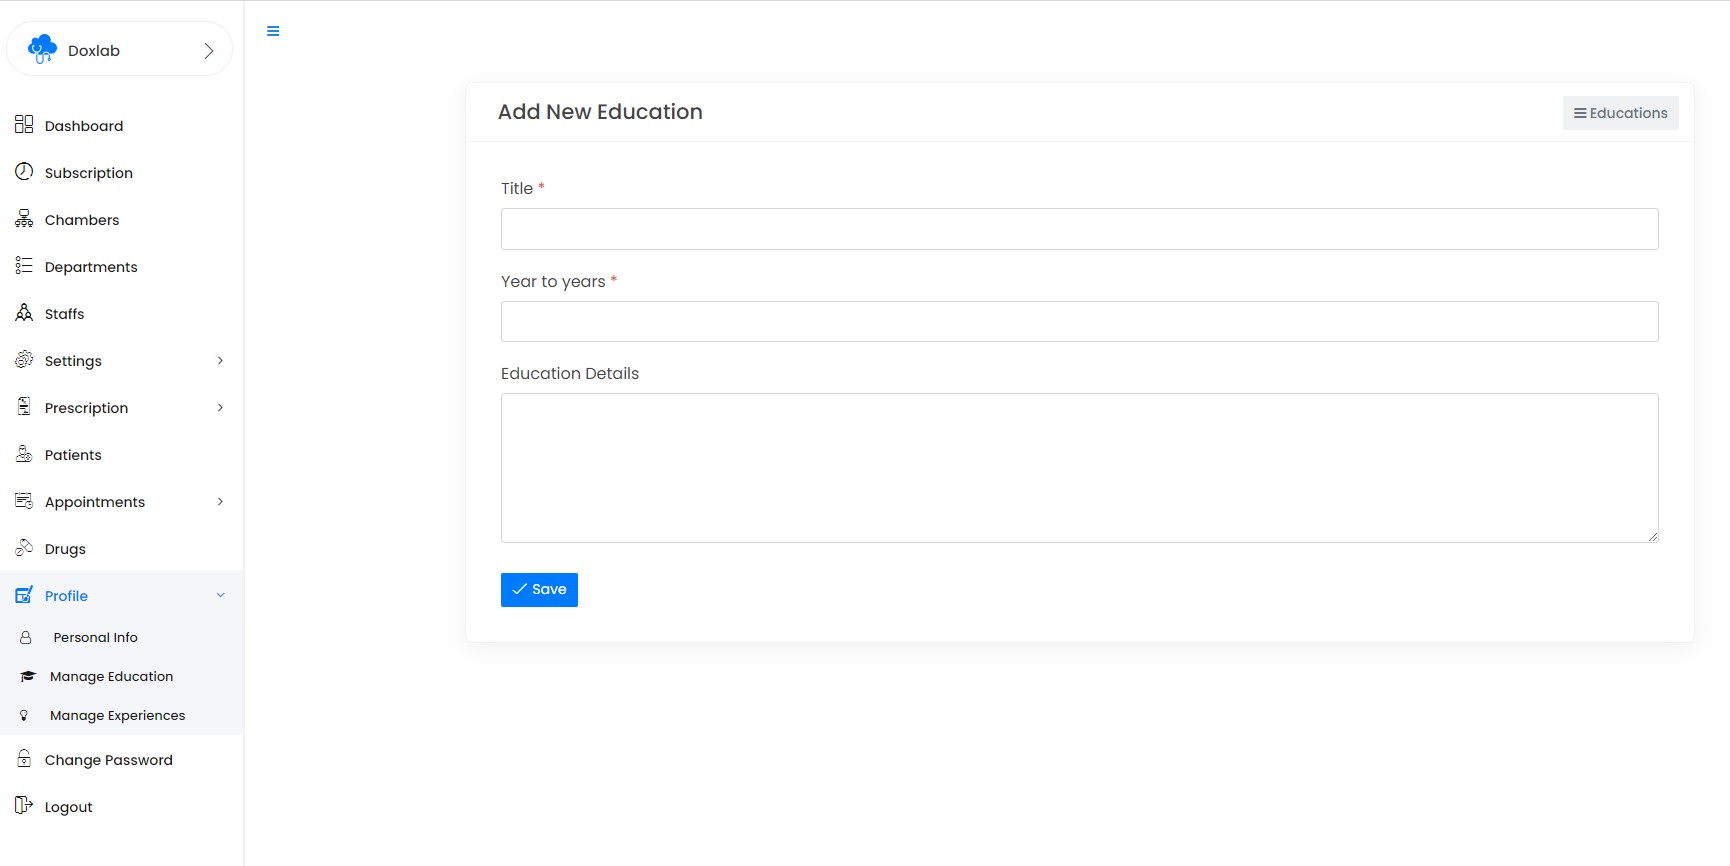
Experiences
24) Staff Panel - top
Staff can access only selected chambers or All chambers which is assigned by the user.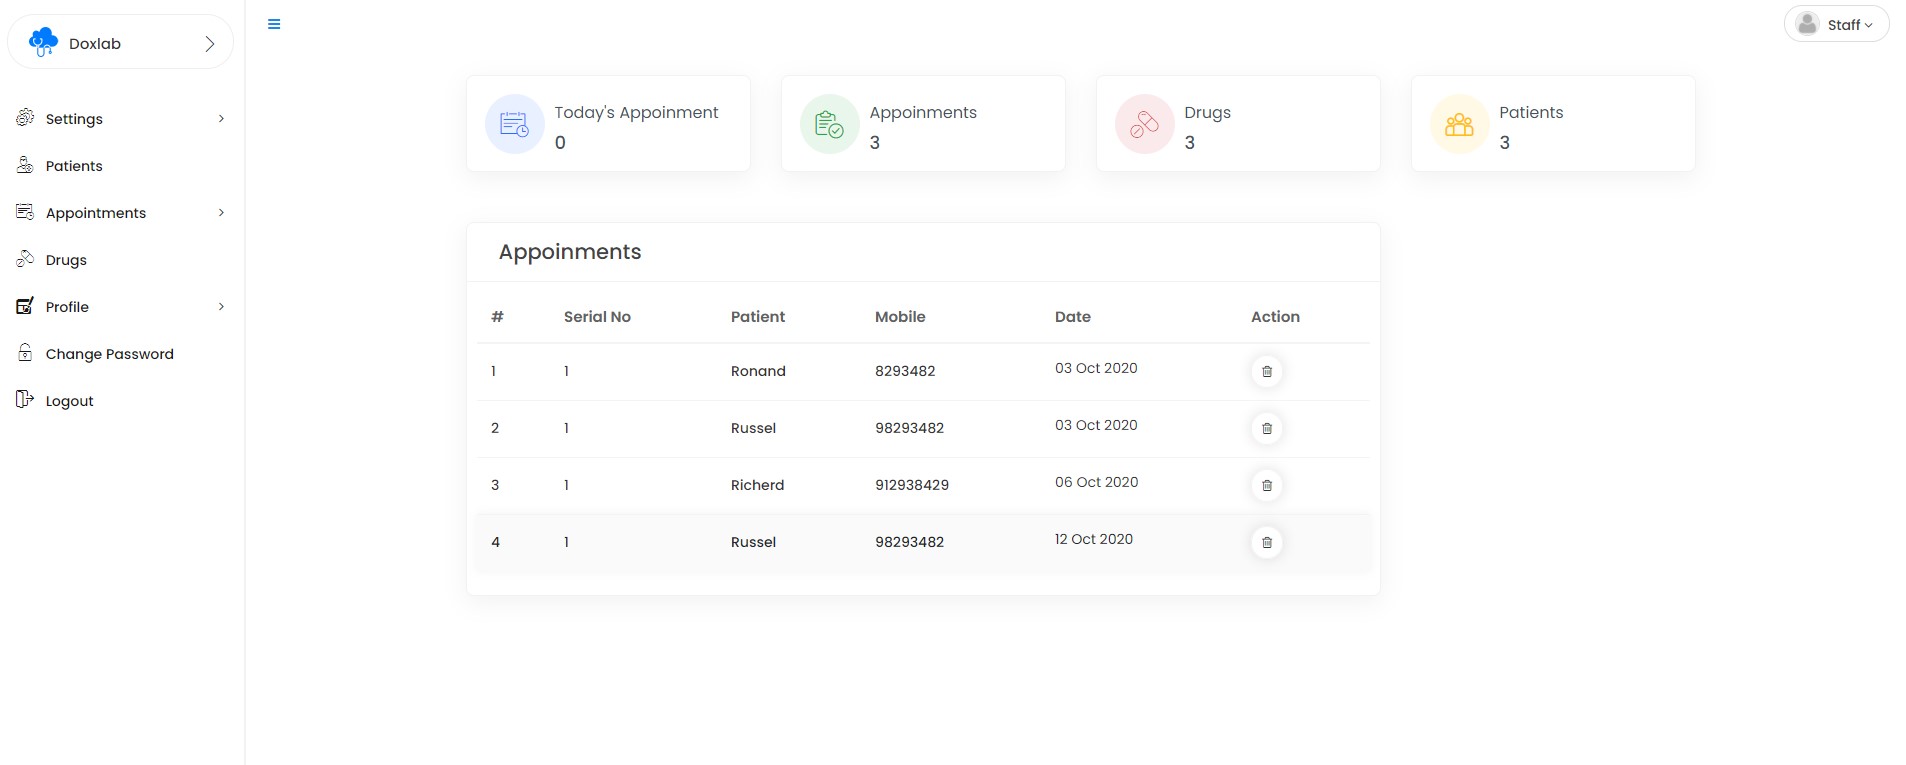
Staff can access Prescription settings, patients, drugs, appointments & dr profiles but they will not delete any data from their panel
25) Patient Panel - top
All Upcomming appoinments will be showing in there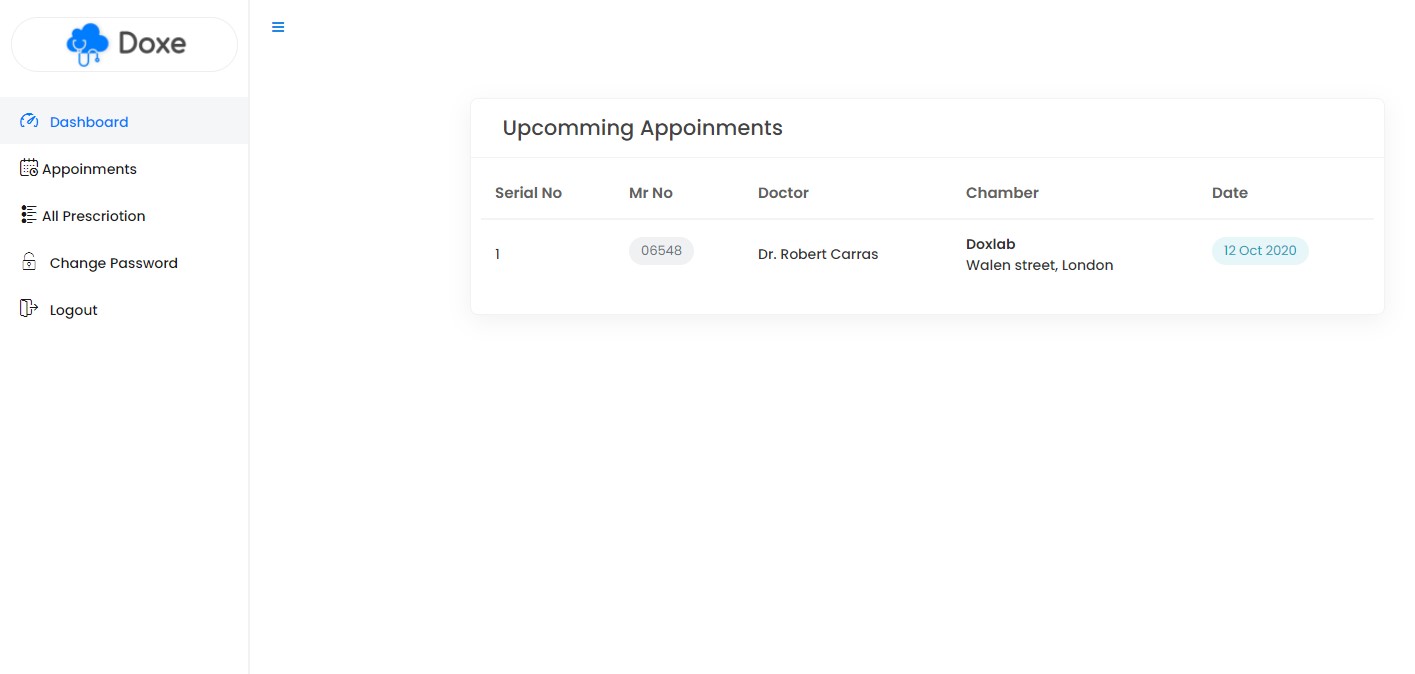
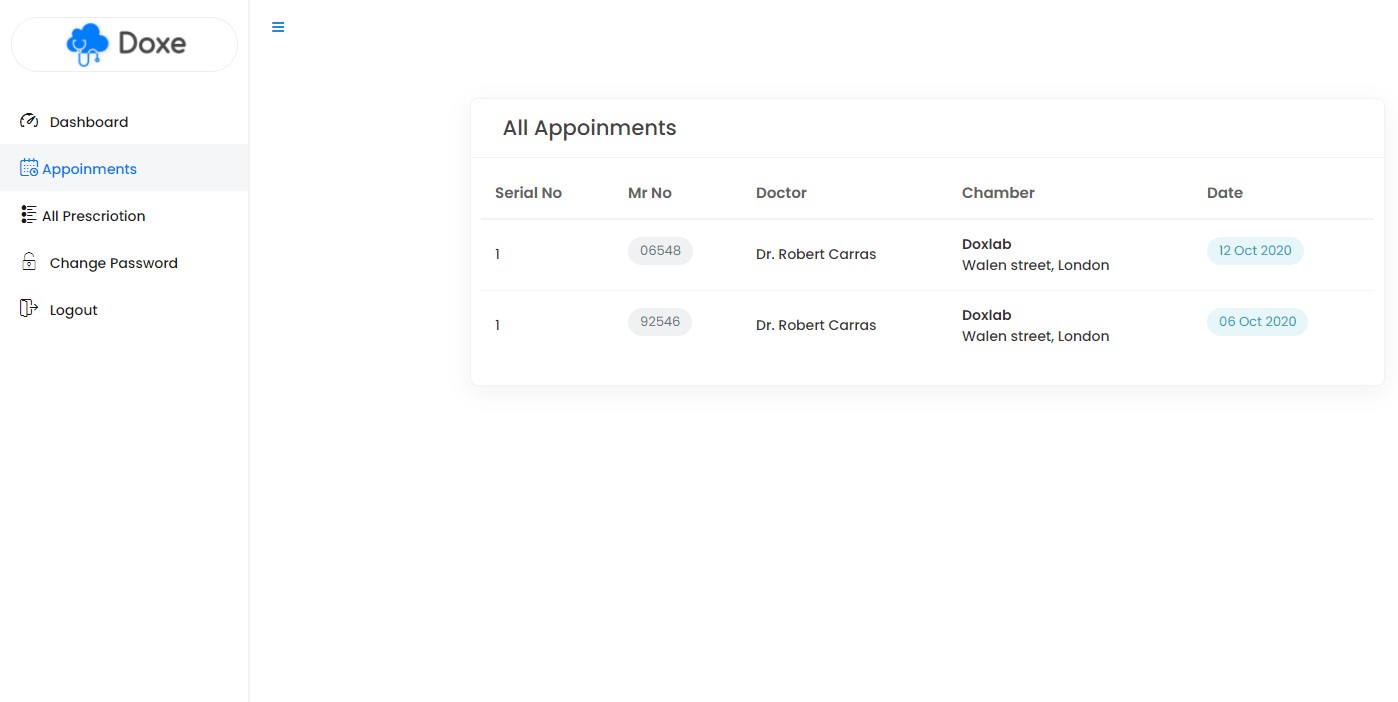
Appoinments - Patient can see their all appoinments here
Prescription - Patient can see their all Prescriptions here, they can also print their prescription.
26)Change Password - top
✓ Change Password: From Dashboard > Change Password options you can update your password here.
27) Credits - top
Doxe script uses the following libraries and assets:- CodeIgniter 3
- Bootstrap 3
- Ajax
- Jquery
- Sweetalert
- Toaster
- PHPMailer
- Simple line icon
- Fontawesome icon
- Flat icon
Codericks